I have noticed several forum members stating that they wanted to fit wood fibre IWI. I have no practical experience to add to those conversations but today I can across advice from a member if LinkdIn, Adam Harper. He is a director of AECB and recently started working for The City of York as their Housing Development Manager. If anyone knows a trick for wood fibre insulation it should be him.
I couldn’t see a way to link to the article so copy it below.
I borrowed a trick from my former team at Green Building Store and mounted the light back boxes on thin pieces of CompacFoam. This provides a solid fixing, reduces the thermal bridges and brings the front of the back box out so it will line up with the wood fibre.
Some things I’ve learnt from installing woodfibre as internal wall insulation:
-
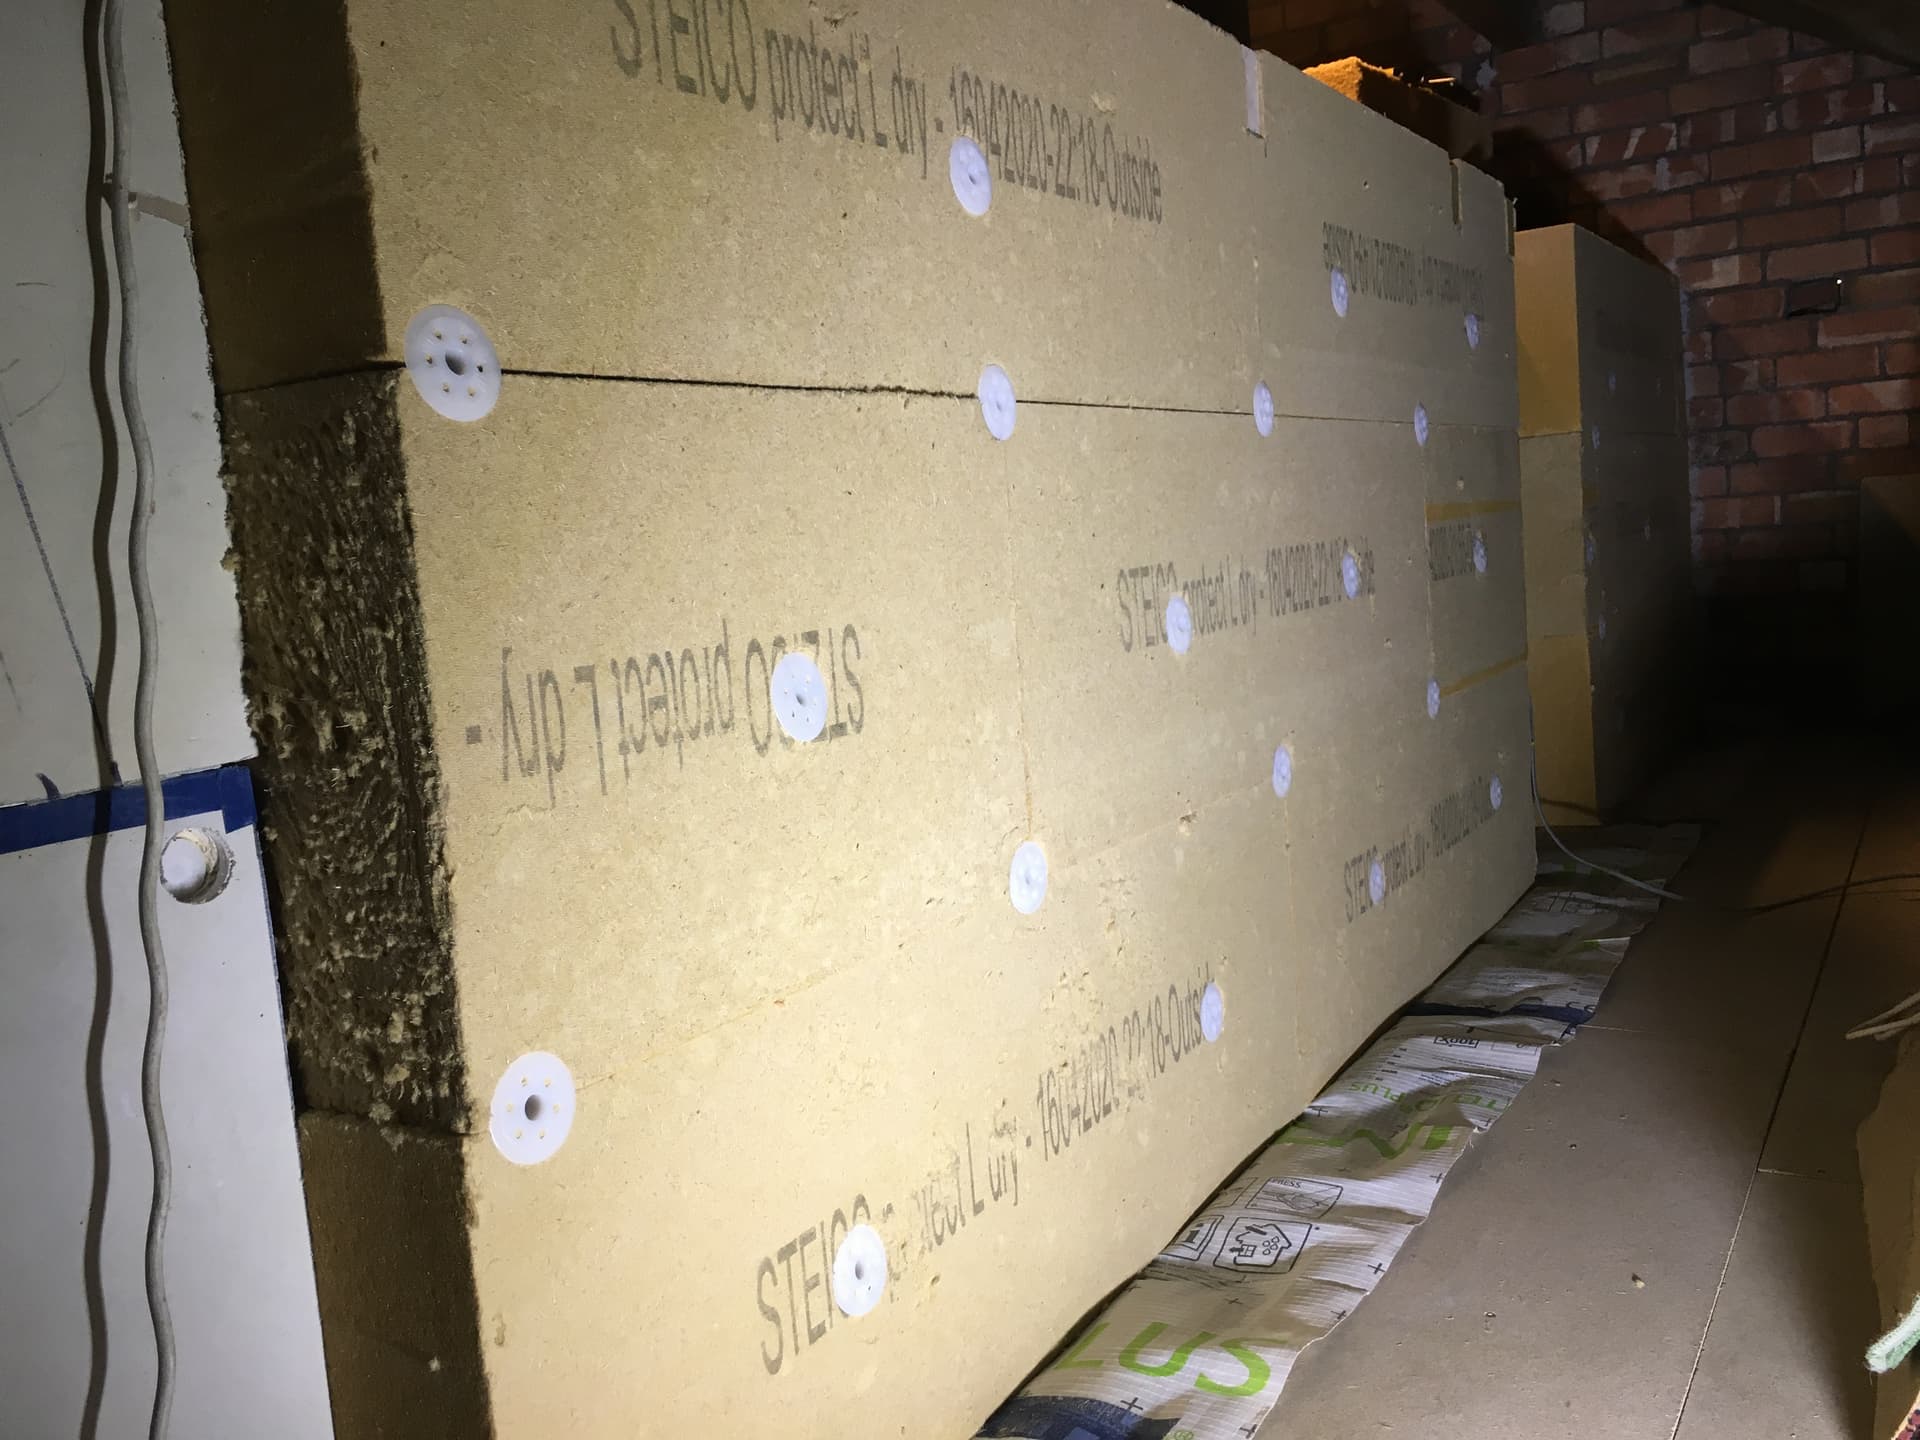
It’s time consuming to measure and cut the woodfibre pieces to size to fit around services, plan plenty of time as it will take you longer than you think. Getting the boards to fit tightly butted up to each other is essential to stop cold bridges. But you can always fill small gaps with Diathonite insulating plaster.
-
It’s better to use one layer of woodfibre than two if you can. I used two layers of 20mm as I got a stack of leftovers from another job, but 40mm would have been quicker to install and better thermal performance.
-
Applying the lime adhesive is messy and you need the right tools. A notched trowel (9-10mm) is advised though a 6mm notched trowel would be ok.
-
Use good quality insulation plugs to mechanically fix the woodfibre. I used Ejot ones, they are very good as they have a pin that is hammered in to provide a really secure fix.
Any other advice from members?
Use a bread knife to cut it and wear goggles if working overhead
1 Like
Fitted 200 mm of wood fibre to single solid walls rising into undated space (loft). Found a rubber mallet and a flat piece of wood useful for getting the thick batts nicely butted up.
1 Like
Should’ve read unHEATed space!
I was wondering how to get tight joins without damaging the batts.
No practical experience, but rather than the cold bridges mentioned at the joins I think in his first point Adam should have said ‘thermal bypass’ (warm air getting into the gap), should he not, rather than cold bridges? And against the single layer argument, two layers in opposite directions would help to minimise such bypass. Joe Lstiburek of the Building Science Corporation in the USA, and a guru in the field, tells an amusing story about that issue: When he was a young and, he thought, knowledgeable building scientist, an old bloke passing Joe’s house commented, on seeing a rectangular pattern in the snow on Joe’s roof after it had been insulated (over the rafters), that he should of course have insulated with two layers in opposite directions so that they overlapped. It turned out that the passer-by had been one of the USA’s foremost building science experts of his time, and lived only a short distance from Joe.
1 Like
A very good point. When using batts it is also advantageous to start one layer with 3/4 batts. This is because the length of most batts is double the width and you thereby avoid joins over joins for every second batt.
You need to do your own sums for the dimensions of your chosen material.
Other ways to reduce thermal bypass are to tape all joins at each level (only practical with foil faced insulation) and to use different dimensions of batt for the two layers (often requires using different materials in each layer to obtain the option).
Agree with Paul, using two orthogonal layers between & over rafters or battens is best. But I would use single layer on masonry to avoid having to drill/hammer double the number of fixings into brickwork.
When I was looking at EWI, before the council vetoed it, my would-be installer had explained how they intended to insulate my curved bay window.
Thinner batts are more flexible, so for the bay they would use two layers with a reduced number of fixings on the first layer to temporarily hold the insulation in place until the fixings applied to the second layer sandwiched it in place. The insulating effect of the second layer over the first layer’s fixings and the fact that the fixings are themselves insulated would prevent any additional thermal bridging as a result of the installation method.
Someone with some WUFI experience suggested two insulation layers was better for moisture management, I think because the extra lime mortar provided a longer pathway than just a single layer of the same depth. More time to fix and slightly more material cost, so probably worth comparing in WUFI where moisture is more of a risk.
Interesting. Wouldn’t the longer pathway also hinder drying out in the event that moisture got in.
In practice, in the lifetime of a building I think you can say that moisture WILL get in, however good the covering. Just wait 50 years and check again how waterproof the render is and how free of cracks, drilled holes, gaps around newer replacement windows etc.