Sorry for writing all of this down in one go, and I would appreciate your input just to help me understand and not miss a trick and get unwittingly some cold bridges added above and under incredibly expensive new doors. Thanks.
1 Like
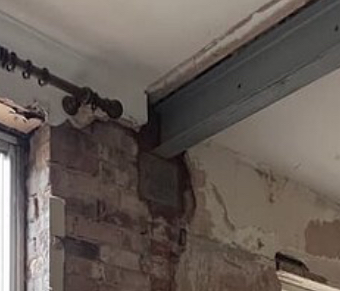
Lintels:
If you anticipate further slight movement between leaves go for 2 single brick thick lintels with insulation between. Use concrete, not RSJs, to reduce conductivity and possible condensation..
If you believe that the leaves are sufficiently bonded to move in unison use insulated double depth lintels.
Also the lintels need to be significantly longer than the arches originally used. Those arches are clearly too short. Precise measurements from your structural engineer.
1 Like
Thresholds:
Compac foam is structural. EPS is not. I expect your builder is thinking of EPS in a cavity with support from inner and outer wall leaves for the threshold.
As the specified size doesn’t match a standard one there are two possible courses of action.
Either:
- Ask your architect about using the nearest sizes, up or down.
- Buy the next size up from your requirements and cut to size. You will probably also find some ad hoc use for the offcuts. Or maybe you can find double the specified dimension and halve it to use.
1 Like
Well, I do agree, but since there is cavity wall insulation ( and I will refill this) between the two walls, I hope it is not significant. Originally, I specifically discussed this with the builder and architect, but they put this steel up so fas and unexpected to me that I couldn’t react. I might have asked them to put some mineral wool into the wall through the hole.
The problem is really that all these things are not part of building control and my builder knows exactly what they look for. That is why I am not stressed about the compass foam and other thermal bridges.
The builder is very good with bricks and mortar and he does now seem to take onboard some air tightness measures. Mainly so that he closes holes where he sees them and I talked with him about air tightness paint and have already bought some. However, it is a battle…
and of course finding the structural issues and holes everywhere, puts cold bridges and air tightness on the Blackfoot as I need to sort that first.
As you suggest, you can try reinsulating the cavity where the RSJ work has exposed it and damaged or lost the previous insulation. You could also insulate the length or part of the RSJ nearest the outside wall to reduce the cold effect brought into the conditioned space of the thermal envelope. However you don’t want to isolate the RSJ so well from the house while there is insufficient at the end that it’s temperature in winter is below the dew point.
1 Like
Very good point. Don’t want to get the steel become a massive conductor for the cold.
I will try to get some mineral wool into the cavity through the sliding door reveal to prevent this. I can look directly into the cavity from the door and the builder has to fit the new lintels there anyway. I will ask him to add insulation before closing it again.
1 Like
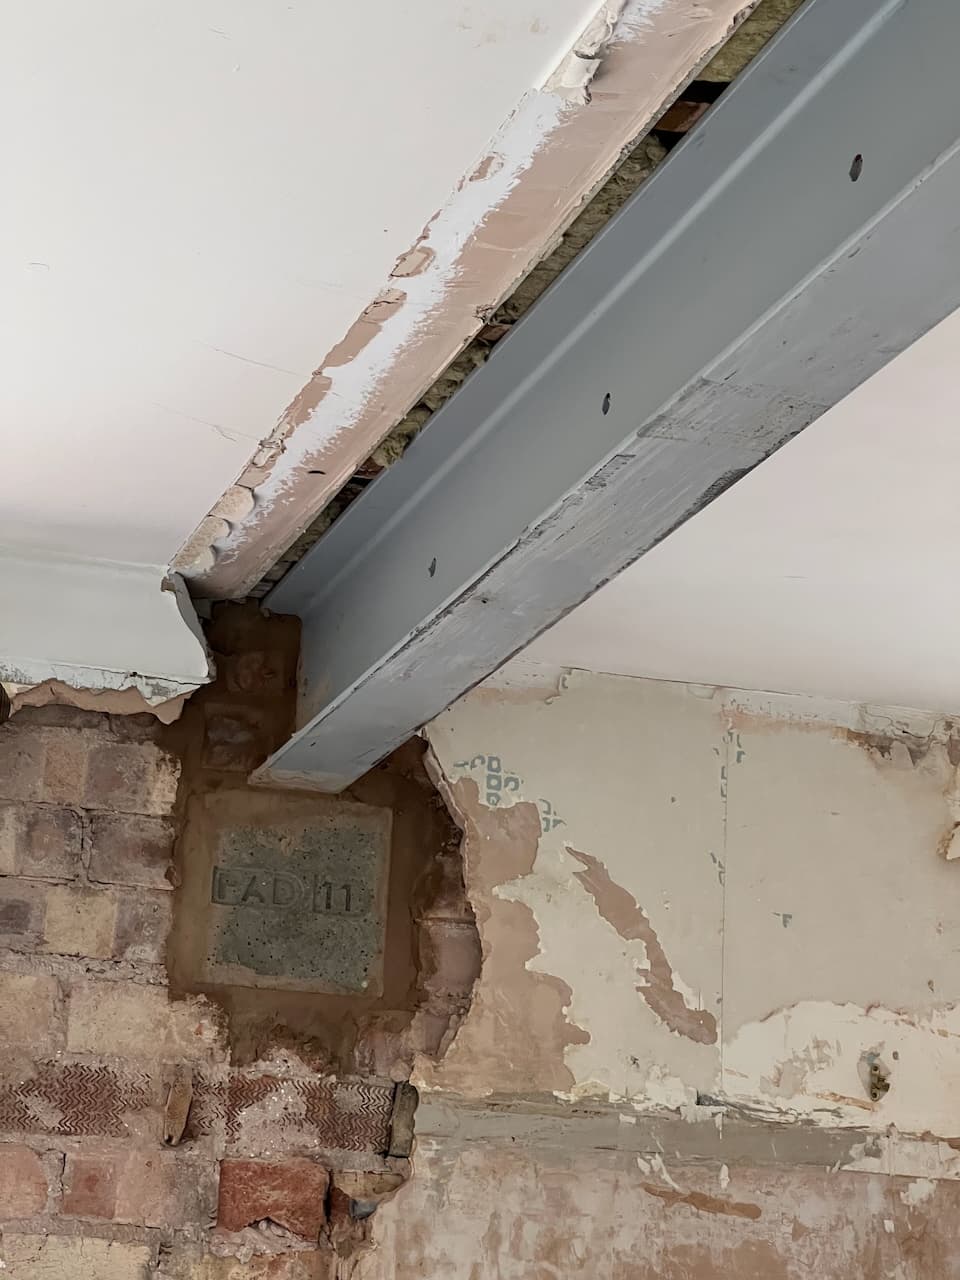
150mm bearing on each side as a minimum.
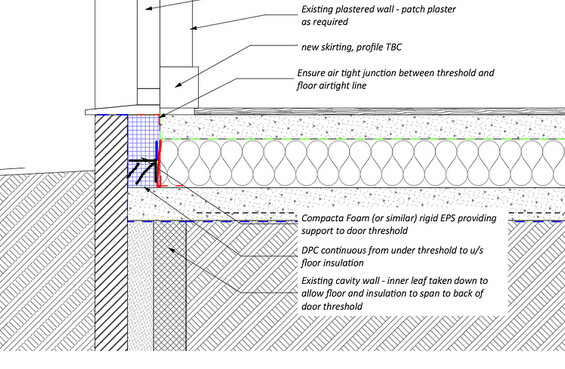
you just need to maximise the continuity of the insulation under the door to the under floor insulation.
If you reduce the depth, you will be slightly increasing the thermal bridge potential. Shown by the black brick i drew and the reduced legth of the blue line compared to red.
If your really concerned about cost. XPS will likely do the job. It is extremly dense and stable in the moist ground condistions.
standard EPS should go nowhere near the ground. I wouldnt even put in the cavity in a non load bearing manner near the ground.
Compact foam is a brand name ususally dense thermoplastic blocks.
alternatly thinner compact foam on top of XPS. XPS has very good compressive strength.
check the compressive strength on the material and the rigidity. compare with the load from the door.
Remember its not jsut the compressive strength, but only ridigity, the compressive creep over time. any flex under the door, after years of repeated use, could result in door opening /sliding issues.
thats whre compact foam excels.
1 Like
I realise my responses are 2 weeks late. I hope things and progressing smoothly.
The structural engineer calls only require 100mm, but specify a padstone on both sides. Can only do 100mm on the side which goes into the cavity wall as the brick is only 100mm deep.
1 Like
A architect friend of mine also suggested this stuff called Brigifoam as an alternative that is less costly: https://www.affixit.co.uk/brigi-foam.html?gad_campaignid=9453149258
1 Like
ahh yeah of course perpendicular to the wall.
Sorry i wa thinking about lintel over door thresholds and the sort. padstones also required.
Any thoughts about how to ‘sleeve’ soil pipes going through an insulated concrete floor?
Building regs say they should be sleeved, but how best to do that and maintain insulation and airtightness through a layer of 100mm concrete, 150mm of PIR and 75mm Screed?
Any suggestions? We have poured the 100mm concrete now and left 20mm around. I am thinking to add some rubber mastic on the bottom and adding Illbruck foam to fill up the rest.
What do you think? And what to do at the next PIR and screed layer? Any best practice advise?
Depending on which concrete layer is the airtight envelope I would just use airtight foam. you could uses an airtightness grommet taped to the appropriate layer.
Regarding insulation, given its just a tiny area I would be satisfied with the same airtightness foam. But i think there are specific insulating spray foams that mayb provide a better lamda value. But i cant imagine theyll be much better than fm330 0.036 W/m·K
In short, id just foam it up with airtightness foam illibrook fm330. Use ti for all service penetrations, window installs, etc.
1 Like
Does your suggested foam remain flexible once set? I would be sceptical about using a foam other than as a base for the true airtightness membrane.
yes sir it does. It is an airtight foam design for the purpose of airtightness with flexability and longevity. 50% movement capability infact.
But i hear your concern. As I said a airtight grommet would be good. You could also use airtight tape to fix the soil stack to the concrete. More likely to deccouple fromt he substrate with movement. But the two together, is belts and braces.
hope it helps
That looks impressive. I tried airtightness foam a while ago and didn’t feel it was easy to use correctly. I now use a sleeve of regular DIY insulation where pipes pass through solid components as an isolation method and then paint with Blowerproof. Blowerproof or similar paint/spray on membranes are so much easier to apply in awkward spots than tapes and sheet membranes.
2 Likes
I now used some Everbuild 145GY Everflex 145 Butyl rubber sealant on the bottom of the hole to seal the DPM to the soil pipe. I used the whole 300ml for three soil pipes penetrating the concrete slap. Then I filled the rest with Illbruck FM330 airtightness foam.
The installer has then cut the foam before putting down the PIR insulation. It should be airtight now.
Next will be the screed guys putting down some thin PE layer to protect the insulation before laying the Underfloor heating pipes. I have been told the screed guys will use some blue expansion foam around all edges and pipes.

I have painted the wall at floor height with Soudal Soudatight LQ before we laid the insulation and the DMP was taped with butyl tape just above floor level. I did it myself with my partner and my builder did a few areas to finish things of. We did ourselves initially as our builder was not quite sure of the need and I wasn’t sure if he would do it without me standing next to him.
Normally, he would have just cut the DMP at floor height after all floor layers are laid. I explained to him that I wanted a good seal and the Soudal Soudatight paint made the surface above and below floor level already airtight (two layers needed) and helps for the tape to stick. We used more than 2 buckets of the Soudal Soudatight LQ for about a 200mm layer at the final floor layer around the 40sqm ground floor. A bucket of this stuff costs about £50, so not the cheapest, but I think worthwhile.
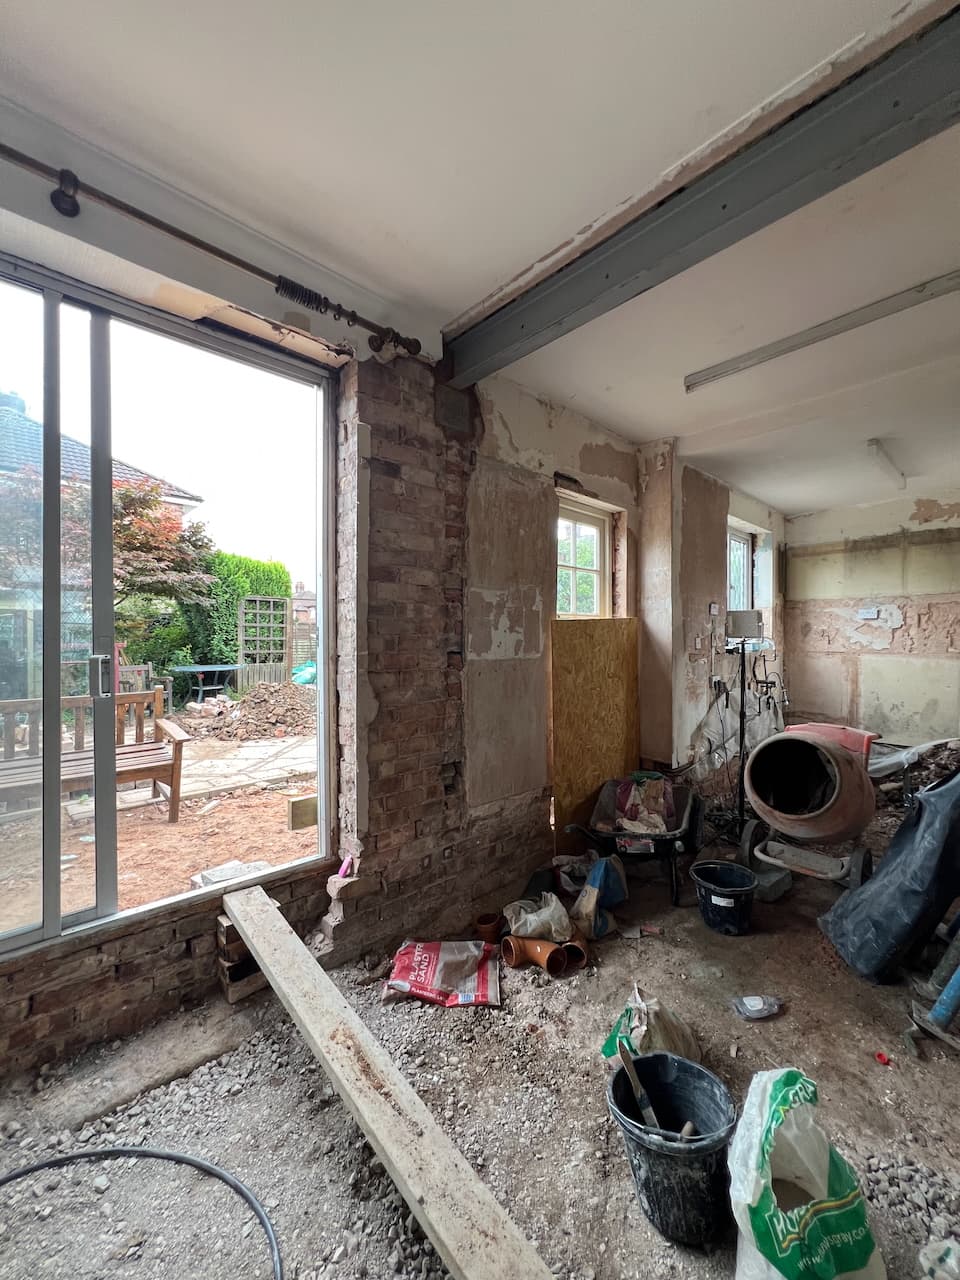
Also worth noting that it is really important to check all corners and edges as my walls (1945 semi detached house) are terrible and a lot of loose mantra and plaster in the way that we cleared before adding the paint. Took about 3 days to do all without stressing. You can see some of the tape and insulation in the photo, and the compacfoam was about to be fitted.

1 Like