I think putting the air vents high up is best because essentially they will be bringing colder air from outside and this will mix as it descends within the room away from the vent.
I will try to pull together a list of stuff from the OpenEnergyMon site in terms of temperature and RH% monitoring. In terms of locations for the EmonTh (temp / RH%) sensors the best location would be away from sources of heat (rads but also TVs etc) and at a height of approx 1.2-1.6m from the floor (ie general middle of body height).
So yes to confirm if using OpenEnergyMon gear then the best combo for you would be 1no. emonPi (which can also monitor your electricity use - add CT clamp and voltage transformer for that purpose) with say 3no. emonTH units to monitor temperature and humidity.
No the EmonTh devices are not weather proof so you either need 1 of the probes you have identified or you need to put the EmonTh in another weather proof box or put it in your outdoor gas meter box (assuming yours is outside).
It might be worth creating a separate thread about home temperature/humidity monitoring.
I think there is a lot of useful information here and it would be a shame to have it buried in this longer thread about thermal imaging!
I know @Matt in particular has been looking at this in quite some detail. I have now created this thread as a ‘linked topic’. Hopefully we can continue to share some ideas on this!
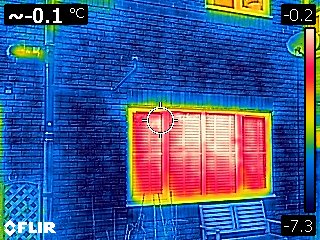
@Peter_Mumford , I have just been looking through this thread and looked at your pdf. I had a professional heat and airtightness survey a while back and one of your images really reminded me of one of mine.
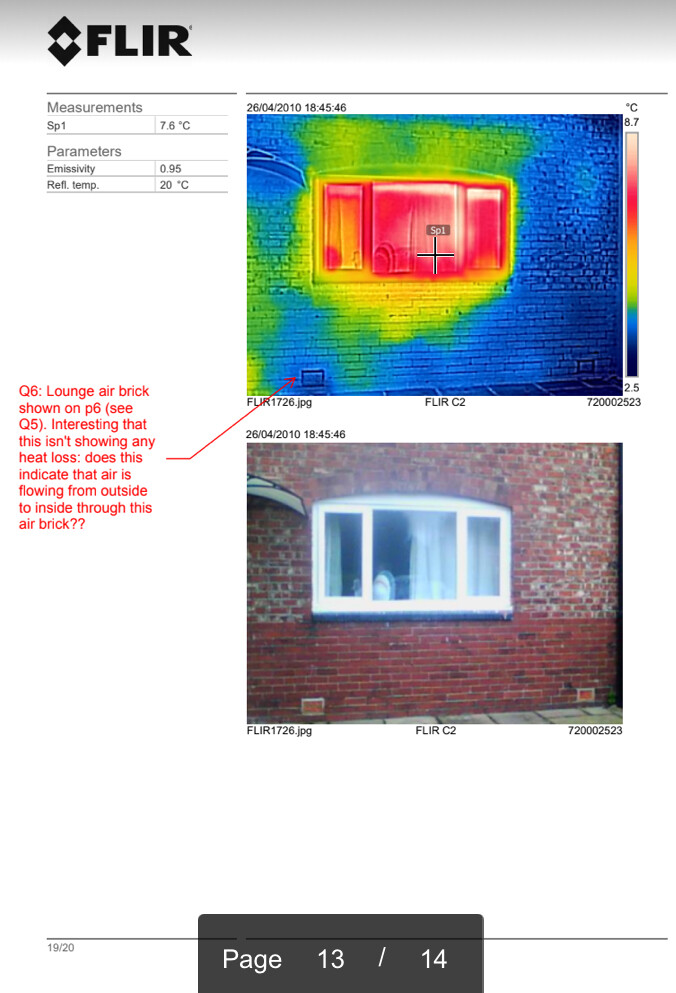
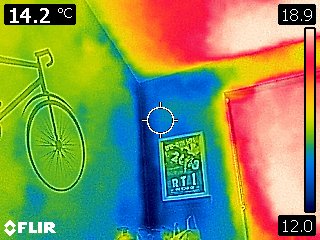
The image of the window on a blue wall shows an insulated wall with thermal bridging at the window. Also, possibly a gap in the wall insulation.
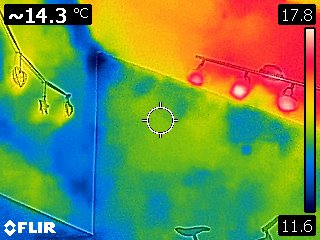
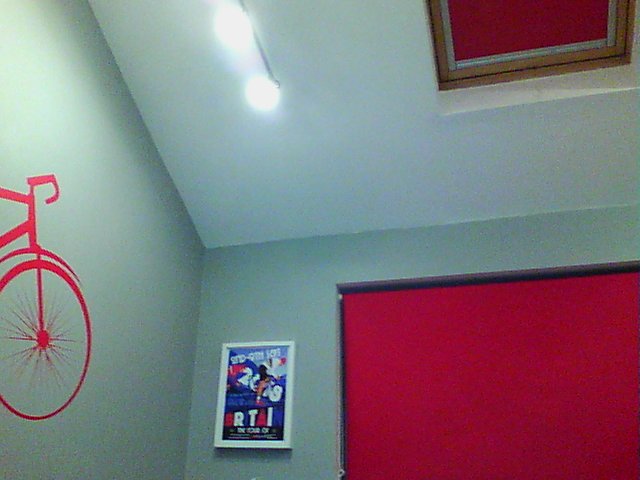
Hi, I have borrowed the thermal imaging camera and would like some help please in interpreting the results! We have a ground floor room out the back of our garage which was an extension in 2009. It has a high ceiling admittedly, but has always been noticeably colder than the rest of the house (house is a semi, the extension has 3 external walls). We have an enormous radiator in there. Without the heating on, the room is on average about 2.5 degrees colder than the rest of the downstairs. It has a concrete beam/block floor and a small velux in the roof.
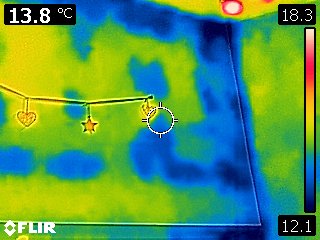
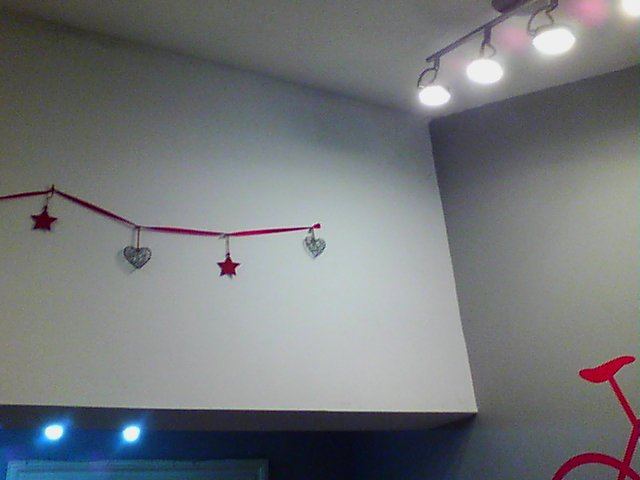
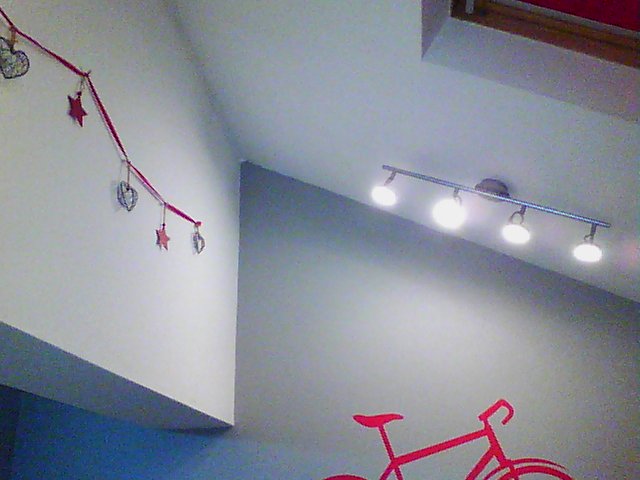
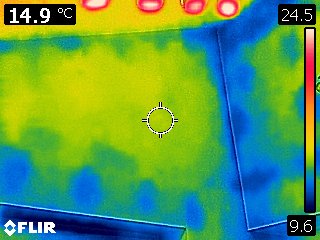
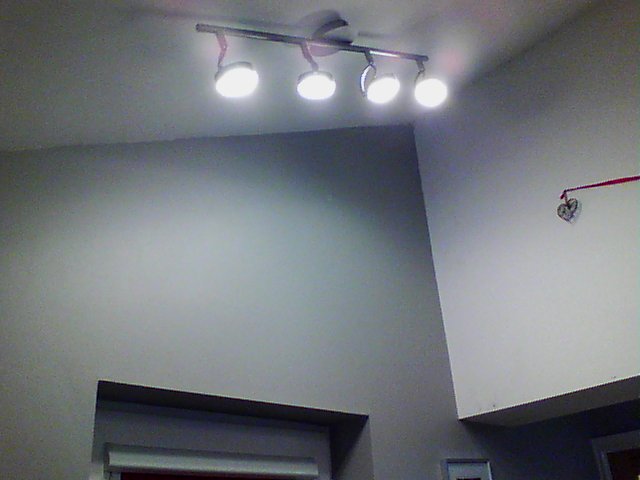
Someone has previously suggested it may be a problem with the dot and dab plasterboard not being done properly ( ie with the continuous beads). I’ ve attached some photos and would appreciate your thoughts- it looks like cold air is getting in where the roof meets the wall of the first floor?- but also issues at wall joints as well. I’m also wondering if theres an issue with the heat from the radiator just going up the wall with the window on it, up to the ceiling and not really heating the room evenly?
Ultimately we are thinking of getting underfloor heating in the room, but would like to be able to fix other issues first? thanks
Also appears to be cold coming in through the base of the skirting.
@Lisa_Varey , I hope you are prepared for a major refit of the room.
Some benefit could be obtained by air tightening the plaster board joins around the walls and to the ceiling but ultimately it is the airtightness of and between the walls that I think needs fixing. Also the airtightness between wall and window frame.
Judging by your final comment about the skirting I expect that the airtightness between walls and floor (not flooring) needs fixing too.
What kind and amount of insulation is in the floor, walls and ceiling? Is there any continuity between the insulation in these elements?
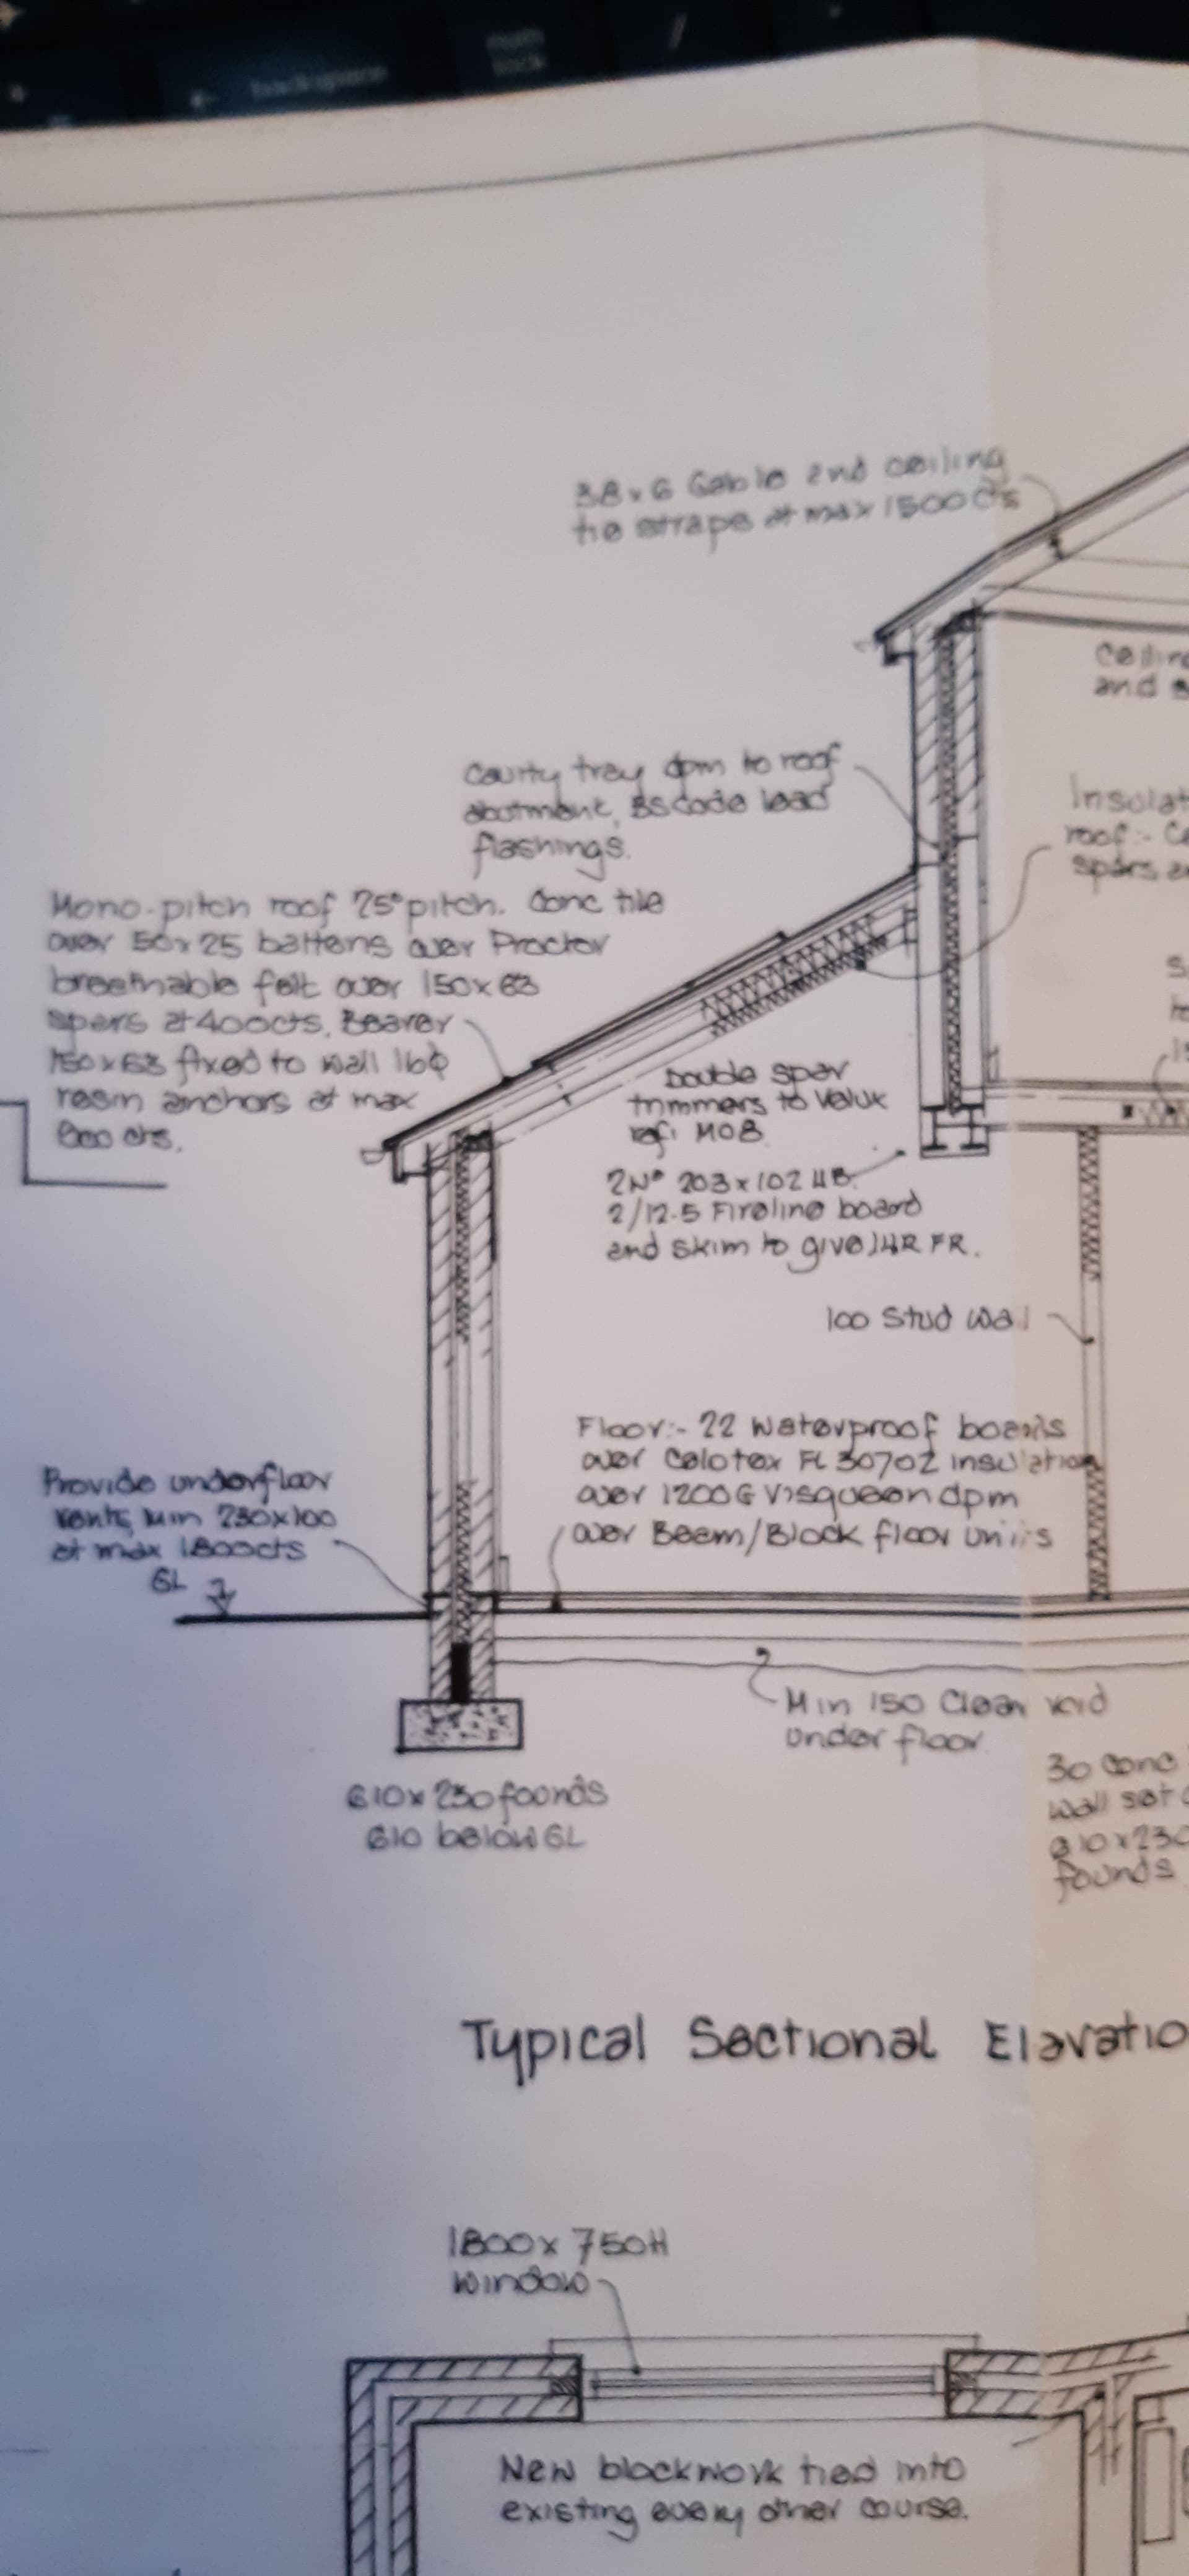
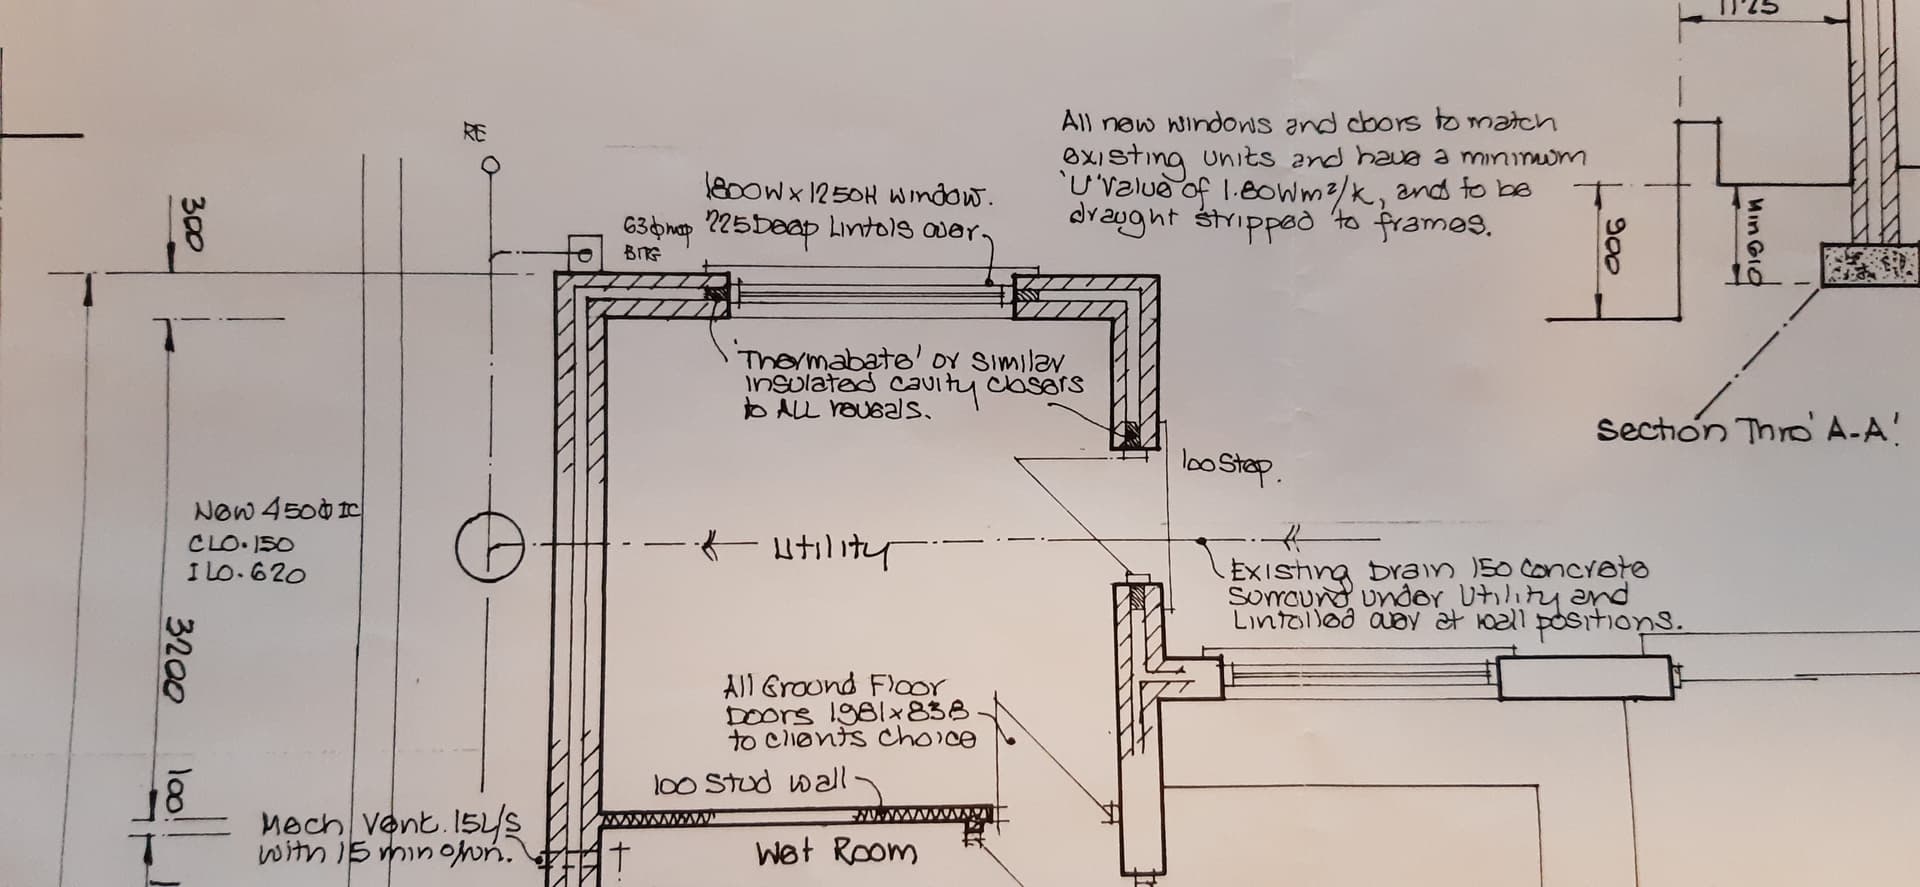
@Tim_Gilbert thanks for the feedback, that is what I feared. I’ve hopefully scanned in a plan and section of what should have been built including insulation- doubt there is any continuity.
Were you the owners at the time of the build? You may have noticed something that with hindsite wasn’t right? I certainly have with my 16 year old extension.
Ostensibly the extension should be nearly thermally sound. There could, should and probably isn’t continuity between walls, and between walls and roof. There cannot be continuity between roof and old wall or between walls and floor. Where there isn’t continuity there should be a metre’s overlap. The overlap probably occurs about 0.00000001% of the time.
The designer hasn’t specified plaster board or wet plaster. It used to be thought that the air trapped behind plasterboard gave additional insulation. It is now known that movement of that air leads to heat loss. If you are really serious you could wet plaster after stripping the board and air tightening. There are insulating plasters that can be used.
If you are confident that the cavity is fully filled then you could apply external insulation, otherwise if you want to increase insulation you will need to use internal insulation.
I’ve just realised that the designer, I’m sure it wasn’t an architect, didn’t specify the size of wall cavity, type or thickness of insulation. Also whether to use brick or block, and if block, what kind. It is impossible to estimate any U value from the extract above.
@Tim_Gilbert Can you elaborate on “If you are confident that the cavity is fully filled then you could apply external insulation, otherwise if you want to increase insulation you will need to use internal insulation”? Is this a general rule, and what would the principle behind this be? My first thought would have been that if the cavity wall is being kept warm in future by the application of external insulation then there should be little risk of interstitial condensation in that wall. Is that incorrect?
You are correct about the interstitial condensation. The issue is air movement in the cavity. If the cavity is not filled and there is EWI then after a short time the cavity will fill with warm air that will rise to the top of the cavity and escape. Cold air will potentially be drawn in, such as via an air brick and a cooling cycle will begin. If for some reason it is not appropriate to fill the cavity then it would be better to have IWI, which leaves the cavity air cool.
Thanks, Tim. If one could be sure that the top of the cavity was fully closed then perhaps the issue you mention would not be so significant? In the case of our own 1950s brick house the cavity at the eaves seems mostly to be closed by slates (albeit with some gaps no doubt where they meet and where they sit on the bricks - these could perhaps be dealt with by taping and parging). However if the cavity fill within has settled somewhat, and if the mice in our loft are getting up through the wall cavity by means of tunnels they have created in the cavity insulation, or if the cavity insulation is less than complete, then I guess we may have considerable air circulation and hence heat losses already, and even more seriously so if and when we came to insulate the walls with EWI. Our cavity doesn’t seem to be closed at all at the gable ends anyway, so I am contemplating filling the top of it there from inside the loft with spray foam, but presumably I may need to strip off some edge tiles and felt at the corners of the house in order to seal the top of the cavity there, from outside. Otherwise, I imagine that the warm air travelling up through the mouse tunnels will pass along just below the cavity-closing slates, where the cavity insulation has likely settled to leave a gap, until it reaches the corners, and will likely escape there, haemorrhaging heat and rendering largely worthless the expense of EWI, as you say.
Although 1950s houses had cavity walls they didn’t have cavity insulation. Any insulation is therefore relatively new, from the ‘80s onward, most likely. Has any of the relevant documentation reached you in the sometimes huge bundle of papers that accompanies a property purchase? You might get an idea from that about how much settling may have occurred.
Don’t forget the borescope available to borrow from the Carbon Coop. Given that there are gaps in the tiles atop the walls you may be able to inspect the cavity.
To borrow email membership@carbon.coop
Hi there,
I have just borrowed the thermal camera from the carbon co-op. Its been great to spot how terrible my loft insulation was as well as identify the cold spots around my wood burner.
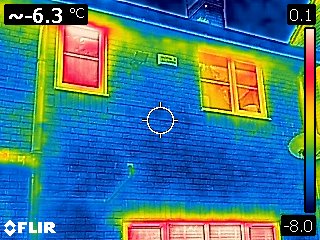
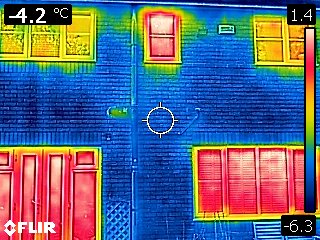
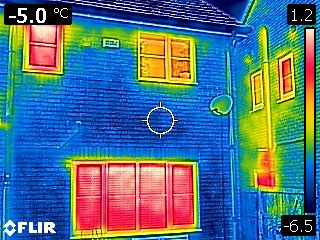
I could do with some advice/interpretation on how the external of my house has been performing. I’ve previously posted how I’ve had issues with my cavity walls ([Bubble wrap foil - Cavity Wall Insulation - What can be done? (Bubble wrap foil - Cavity Wall Insulation - What can be done?) Well I managed to get outside to check the house, I was expecting the walls to be quite warm but they “looked” great compared to the windows (they are 20 years old to be fair) but am I reading this right? In my head, if I had a well-rounded house then the walls and windows should be roughly the same shade colour i.e. low heat loss, but to see such differentials am I to conclude that most of my heat is escaping via the windows and not the walls at the moment? FYI House was 19 degrees and it was -1 degrees outside