On its own a blower door test doesn’t tell you anything other than the airtightness of the whole house. It’s a nice to know, not a need to know.
There are a couple off add-ons to the blower door test:
Where air loss is low try using joss sticks to trace where air is moving by watching the direction of the smoke.
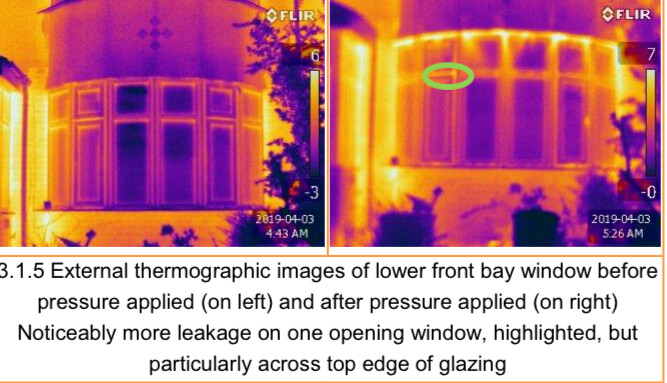
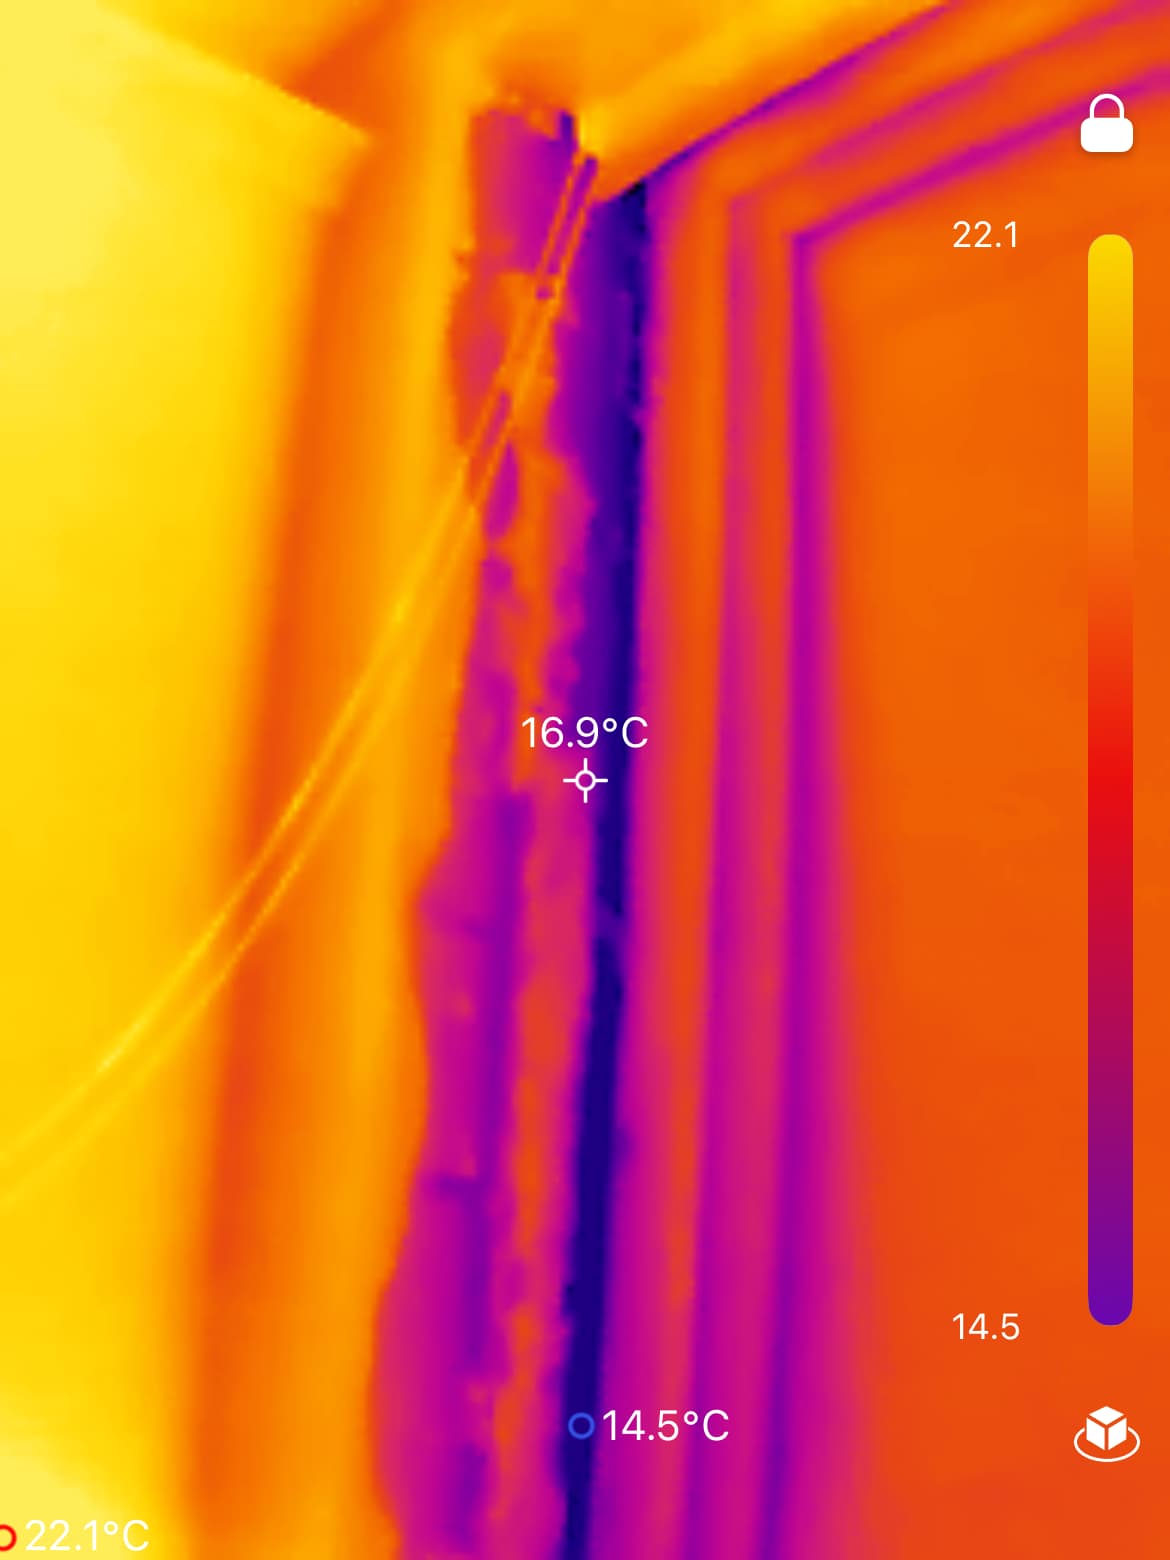
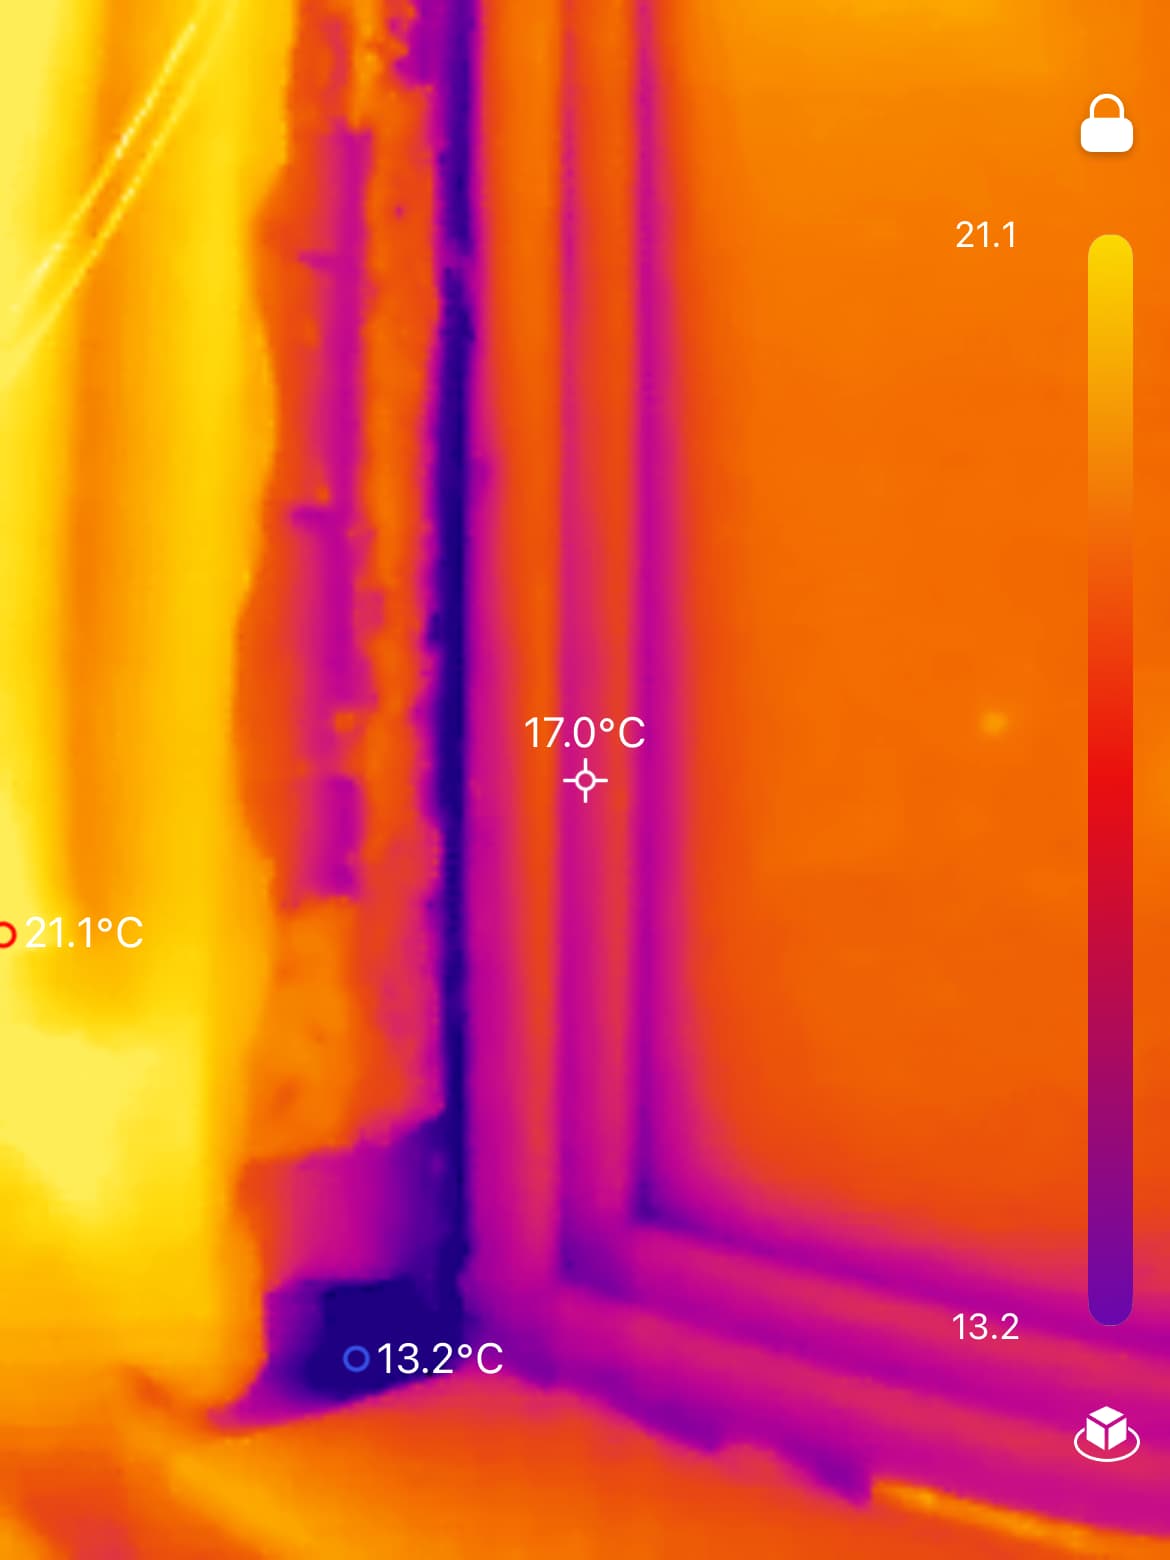
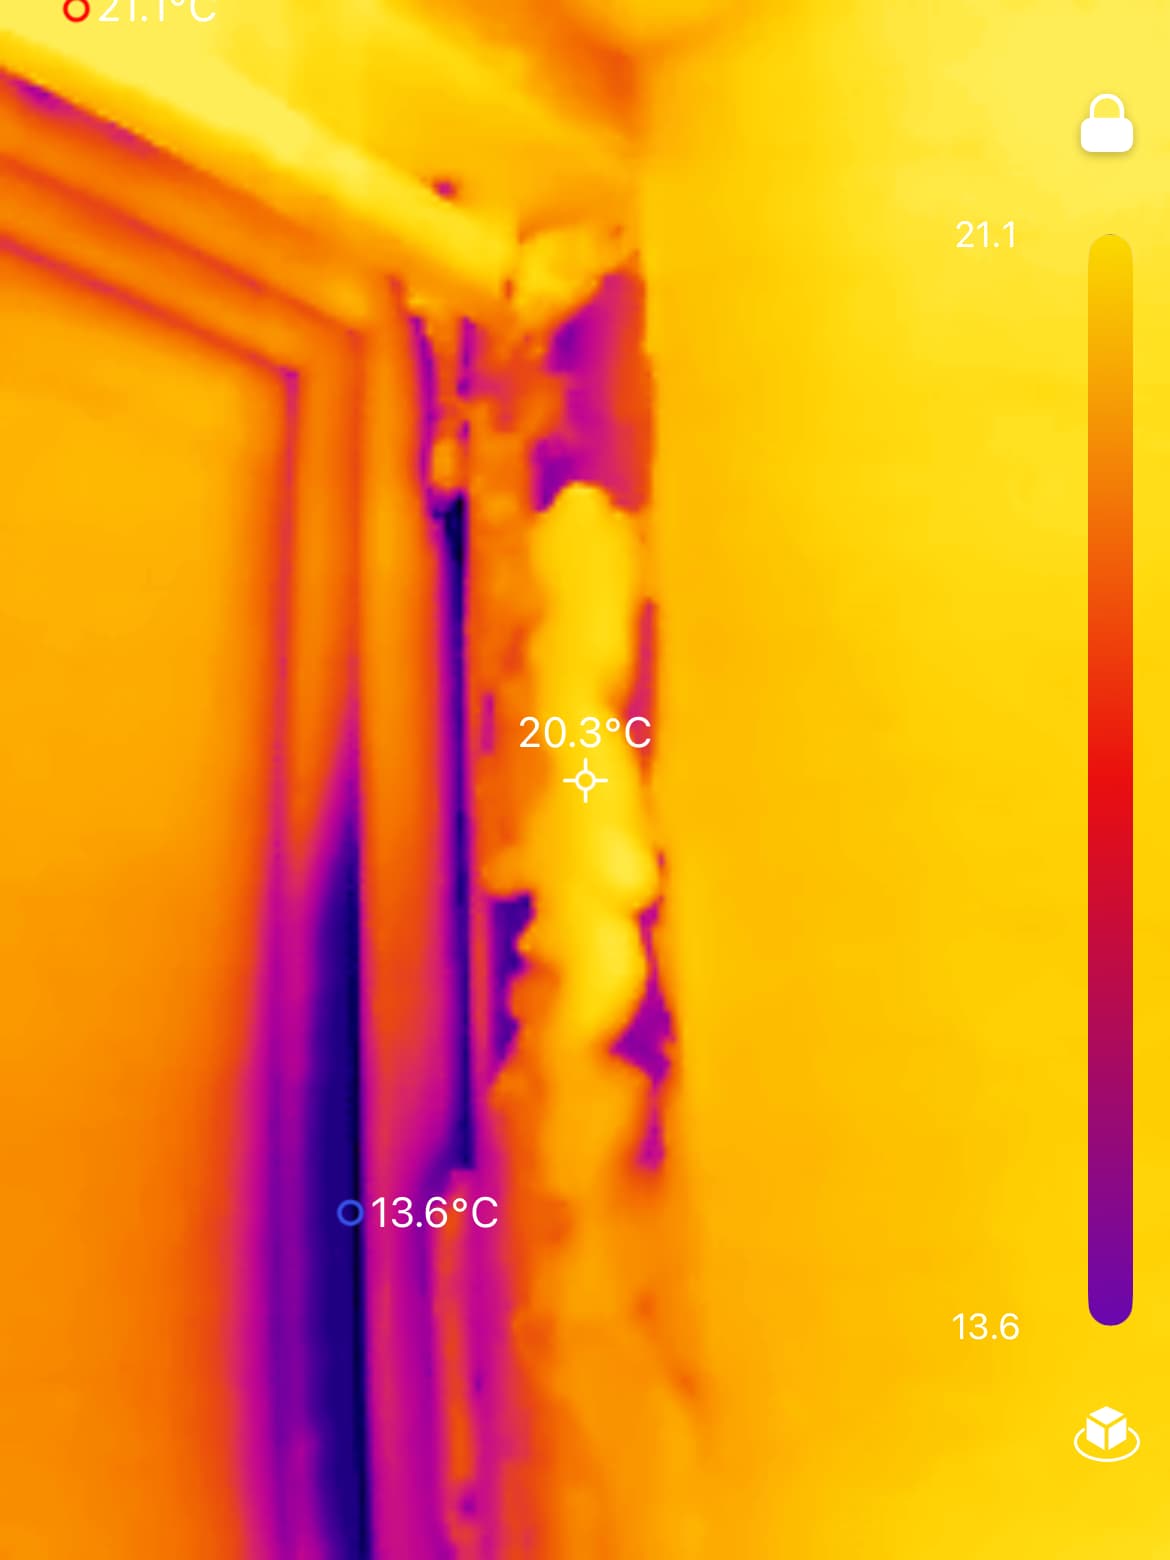
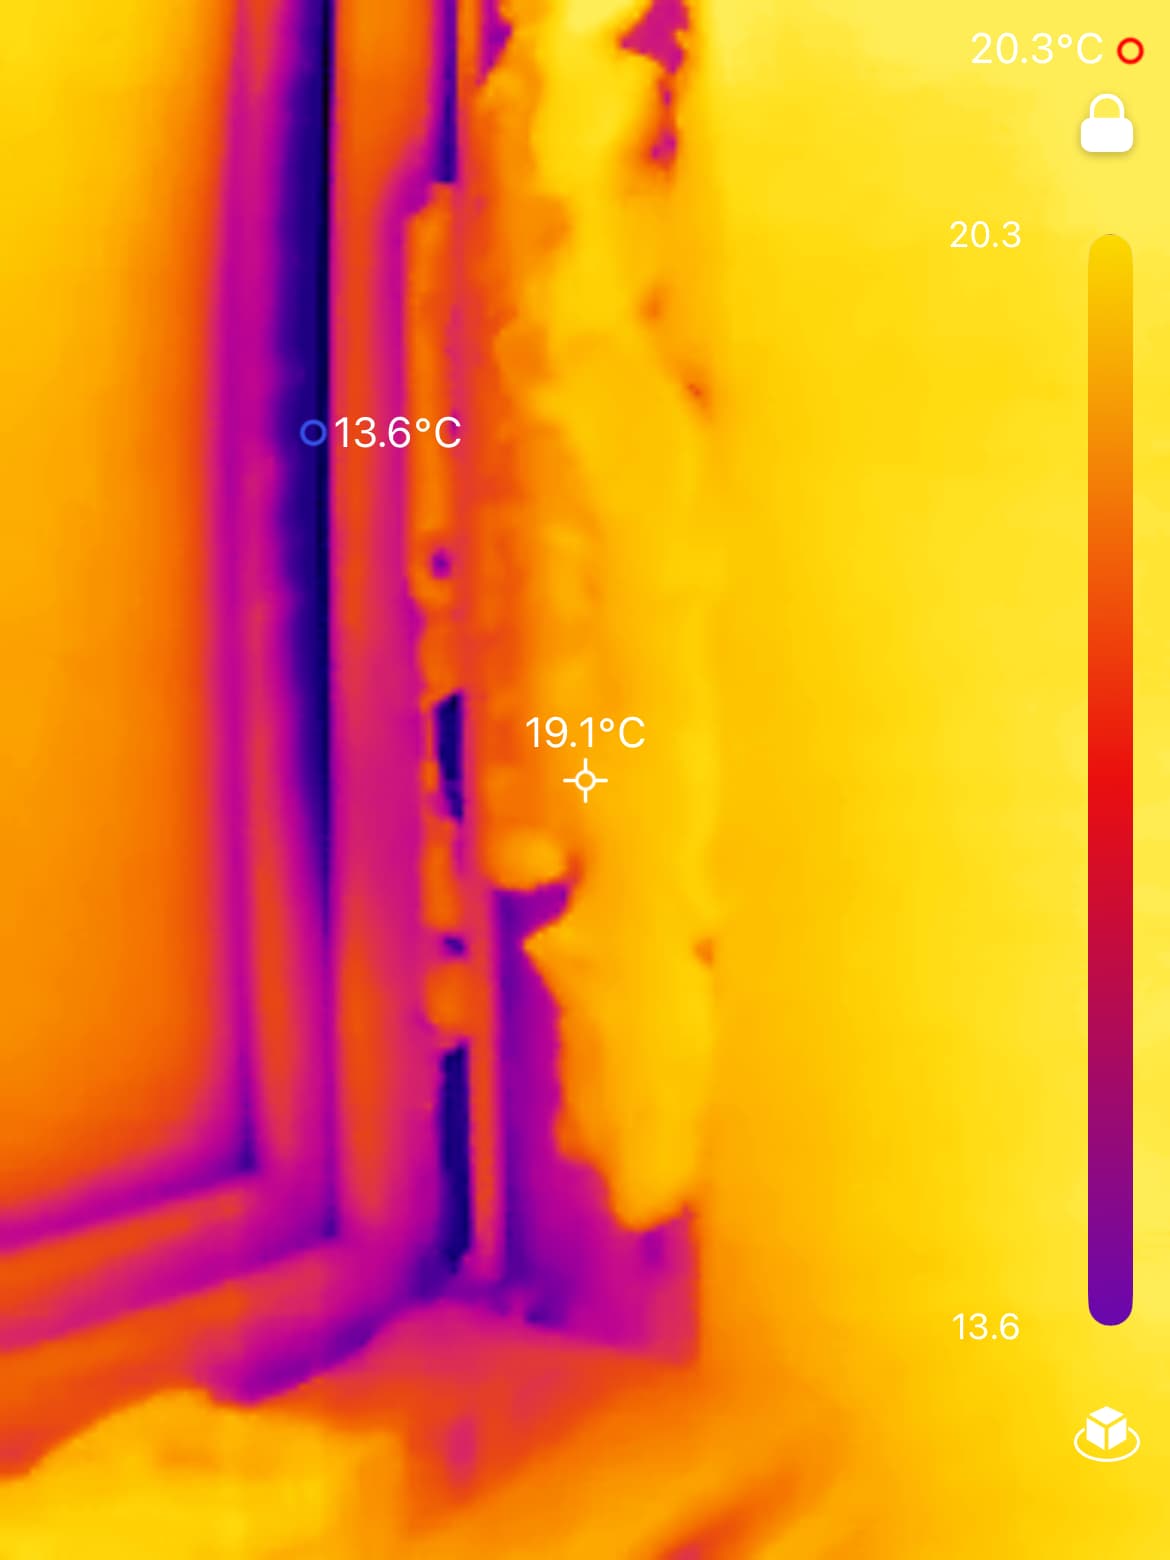
Where air loss is higher, and this is what I did, do a full thermographic survey while the fan is running. Where air is escaping shows up as hot spots from the outside. Where air is entering it shows up as cold spots on the inside. As air permeates the fabric the hot and cold spots are not necessarily opposite each other.
I was fortunate to have the esteemed Paul Jennings do the hard work at dawn one frosty morning.
I ended up with a 43 page report. Here is an example:
Edit: I didn’t answer the question about when the work was done. That is after the windows were changed!! Part of the reason for having the job done was to gather evidence of the shoddy installation.
Ideally, if you can strip back as much as possible for the air test that’s helpful, because once you have channels of air e.g. behind dot and dabbed plasterboard it can be very difficult to know where the source of the leak is.
An air test early on is helpful to plan ventilation. It might be your leakage is better than expected - we all hear horror stories about how bad some of the stock is, but some isn’t so bad that blocking up holes won’t cause a ventilation problem. So it makes sense to understand when you might need to introduce ventilation, and also what sort of ventilation it should be.
Exactly. At the time of my airtightness test the permitted ach was 10. My house got 7, despite all the leaks found. Not so much a reflection on my house but on the building regs of the time.
It depends how your installing your windows but in gerneral, find the smallest horizontal and vertical measurment of your masonary opening, take of 10mm, this is what you order.
If you want to use foam tapes, account for more, The foam tapes come in different thickness.
You are always looking for continuity in the airtight layer. In most step by step retrofit situations the plaster on the walls is the airtight layer. This must be connetected to the frames of your lovely new triple glazed units. Typically with airtight tape/membranes. Fill the gaps bewtween masonary and windows with airtight foam.
In the case of EWI the insulation will cover the airtight foam from the outside, and in another situation . it could be covered with whatever really. I have installed in the past with compriband foam tape.
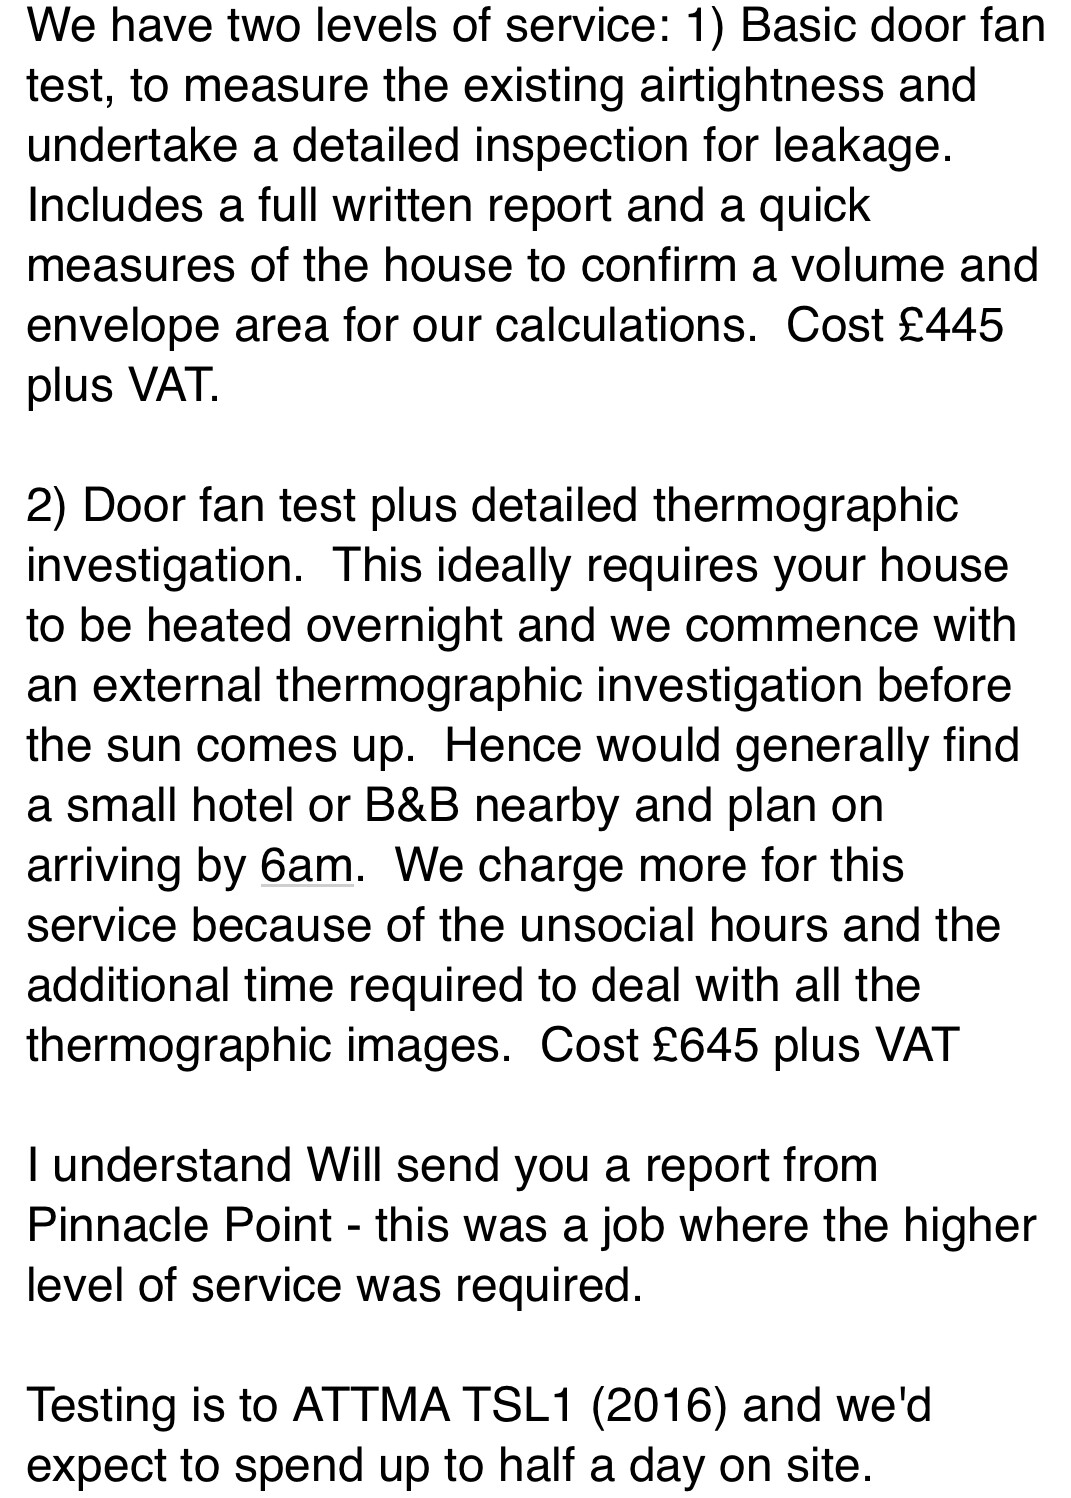
However, my kitchen will need a revamp and the previous owner has actually tiled up to the window. See photos. Not sure what is under the tiles, but I assume not much or could be plaster. I assume tiles are air tight, but they are not a great insulator. So when I change the windows, I will probably take out the tiles first.
Also, when I tried to measure the masonry opening I got a bit of a problem with the cill and how to measure it. It seems to be under the window frame, but not sure where the wall opening actually ends. See photo.
Any thoughts on how to measure this and what do do with the cill if I have to take it out anyway. I think the high performance windows all attach the cill to the outside window frame, so there is nothing under the frame, but not sure.
Yes, intact tiles are airtight. You can’t necessarily say the same about the grout.
You are fortunate that you have exposed brick. Where you cannot get a straight line to measure you can use the number of courses as a guide.
You definitely don’t want to keep the old cills. They will have too high a U value, probably 1.5-1, possibly higher.
Passivhaus certified cills are available and worth it if you are aiming for Passivhaus or EnerPHit standard. Also for humid rooms, where a cool cill is more likely to result in condensation. Less insulating cills are available. Standard uPVC cills are not insulated.
Whether you change the cill or not, the window board should be raised to above the cill and the space so exposed insulated. The cills are the weak point of EWI, which is why they are sometimes omitted. I don’t recommend omitting cills unless you never get driven rain in your location.
Remember to get cills deep enough for your future EWI and a decent overhang to prevent driven rain from getting behind or into your nice new wall covering.
Decide on the cill before the window and allow for it when specifying frame height.
Tiles aren’t actually that bad in terms of remove and replace. I would take the first line of tiles off, treat the wall as any other in terms of the air tightness and then replace the tiles, cutting them to fit. If the wall underneath is in bad condition you’ll just have to deal with that. The goal is to ensure a continuation of the air tight layer from plaster to window (assuming that is your air tight layer).
I think the high performance windows all attach the cill to the outside window frame, so there is nothing under the frame, but not sure.
I think the default tends to be to stick them onto the window face, yes.
Other thoughts:
Some cills have little fins at either end. These are good for directing drainage straight over the cill, rather than it being wind driven against the wall which can cause staining.
Aluminium cills can be a bit thin and bendy, and you end up with a hollow space under the cill which can cause noise during heavy rain. I’m not sure on the solution for that, but see if you can have that filled, I guess by a more robust cill with something underneath.
The bendiness should also be watched out for with doorsets, because if people (and by people I mean children ) start standing or bouncing on them… they’ll need support.
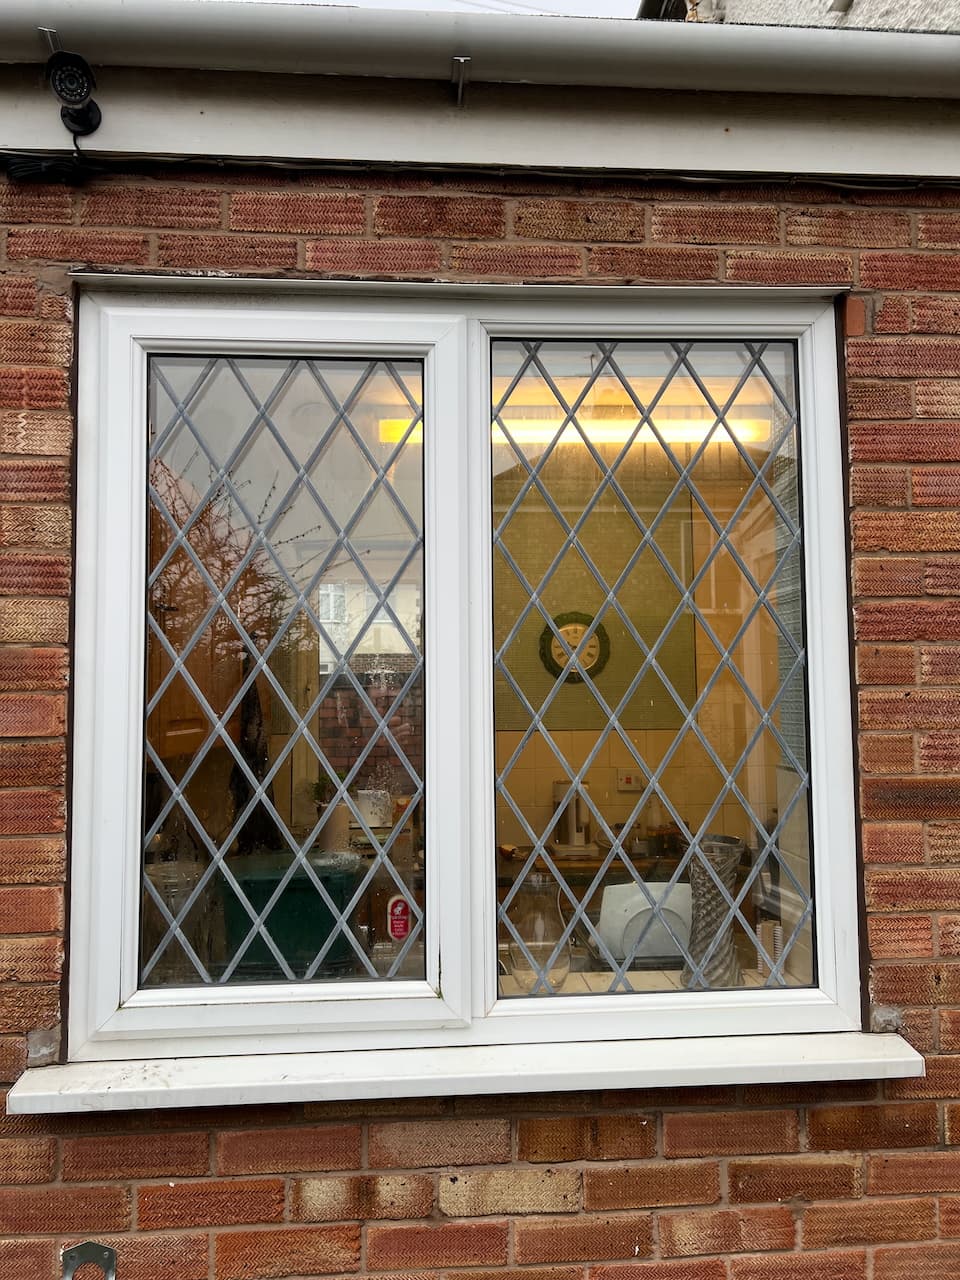
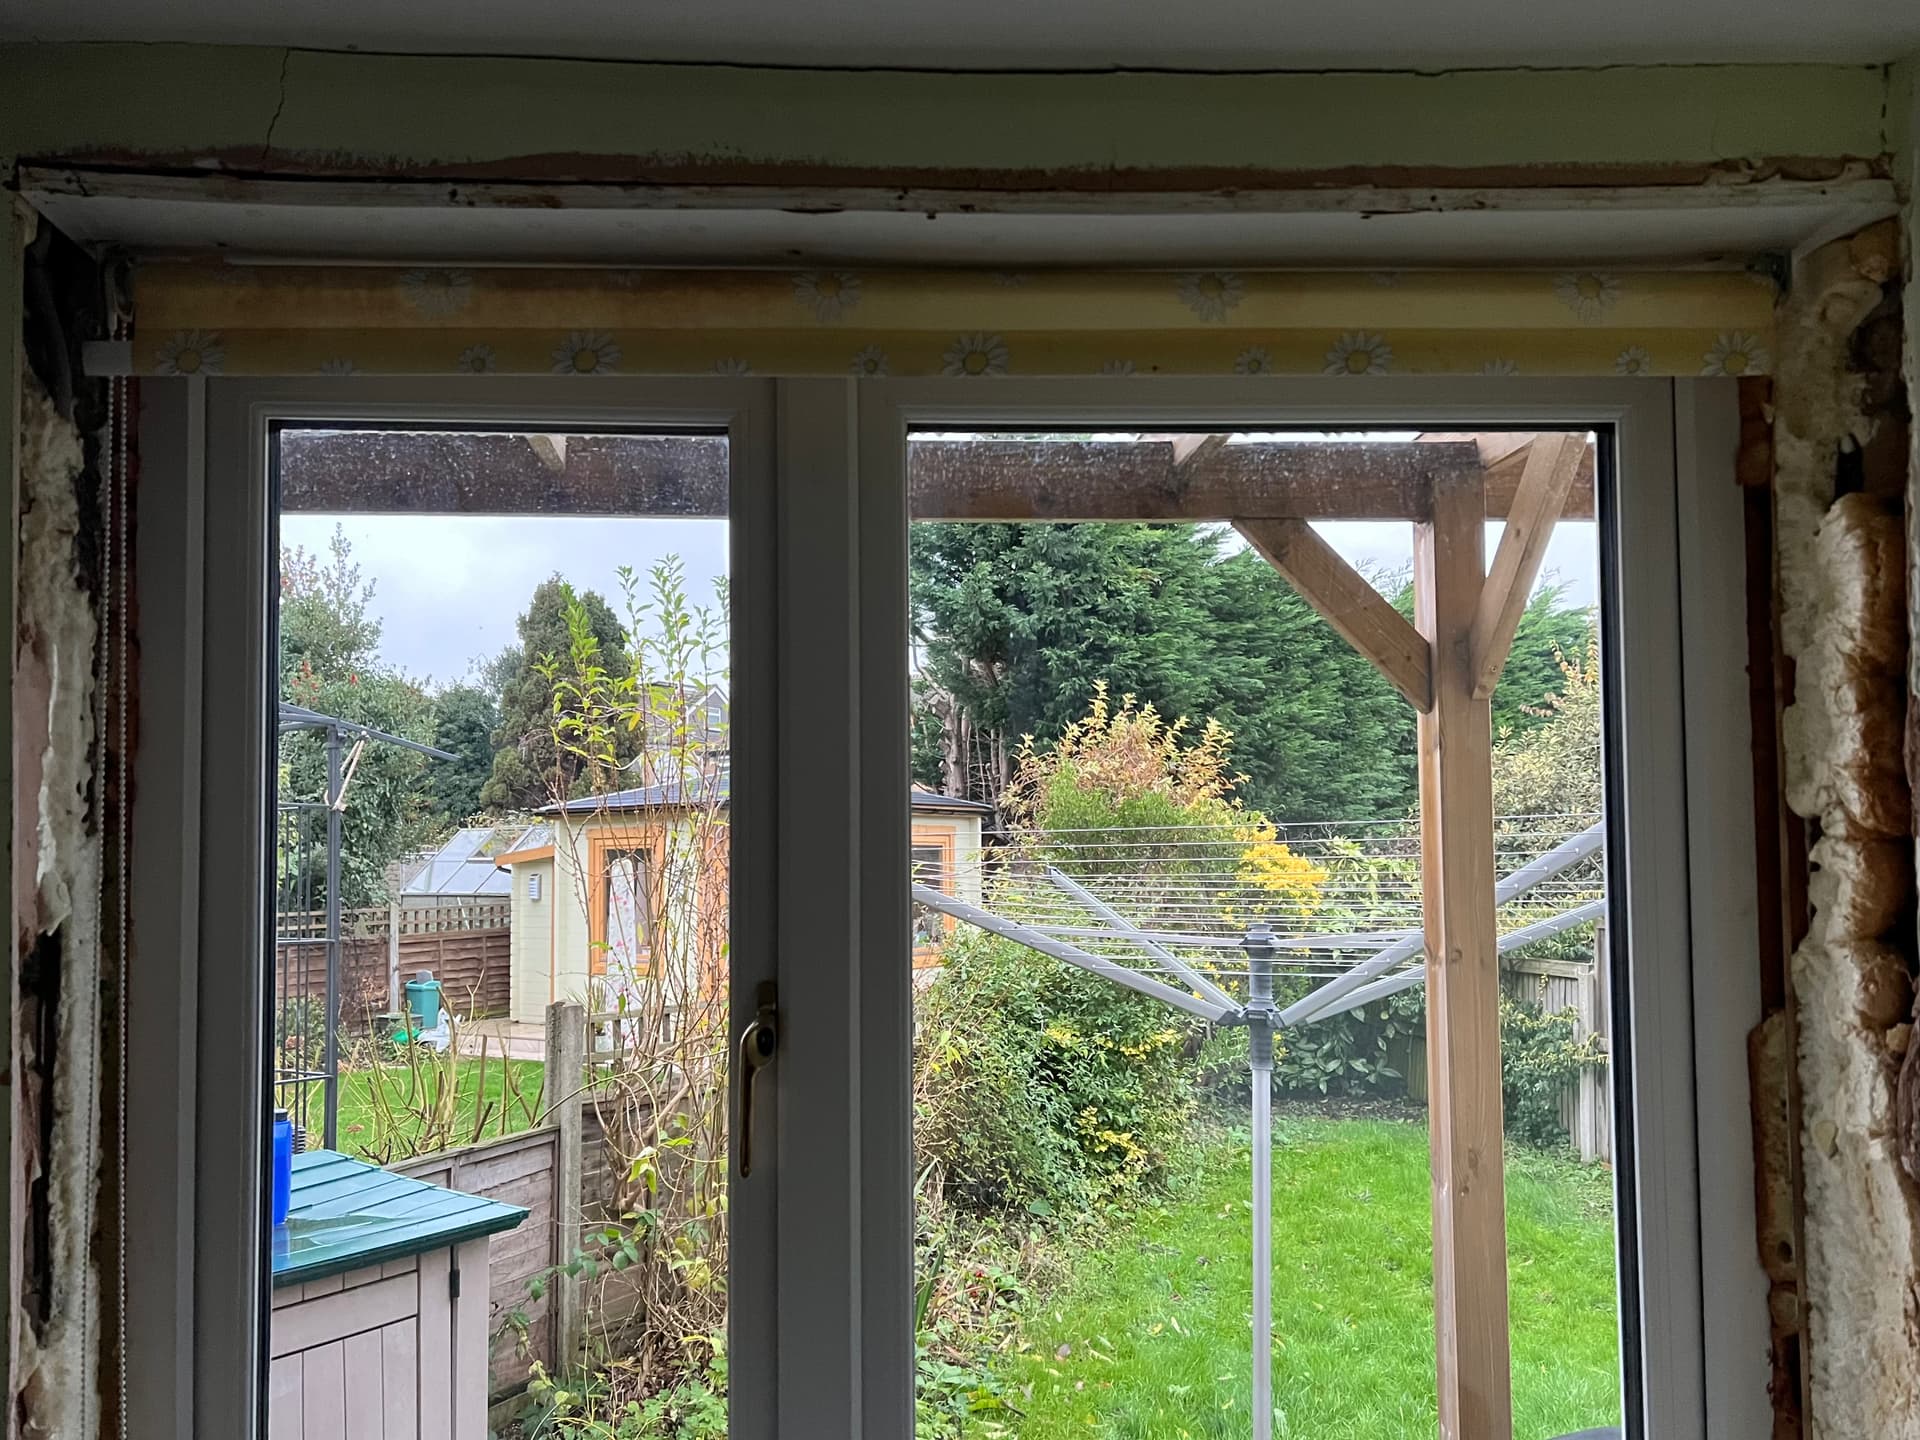
I’m reviving this thread as I have bitten the bullet and started work on one of the two windows still needing their reveals “done”. It is the kitchen window and I am taking advantage on Mrs G’s absence for two weeks.
The window was boxed in with MDF, which I have prized from the sides and struggling to remove from the top.
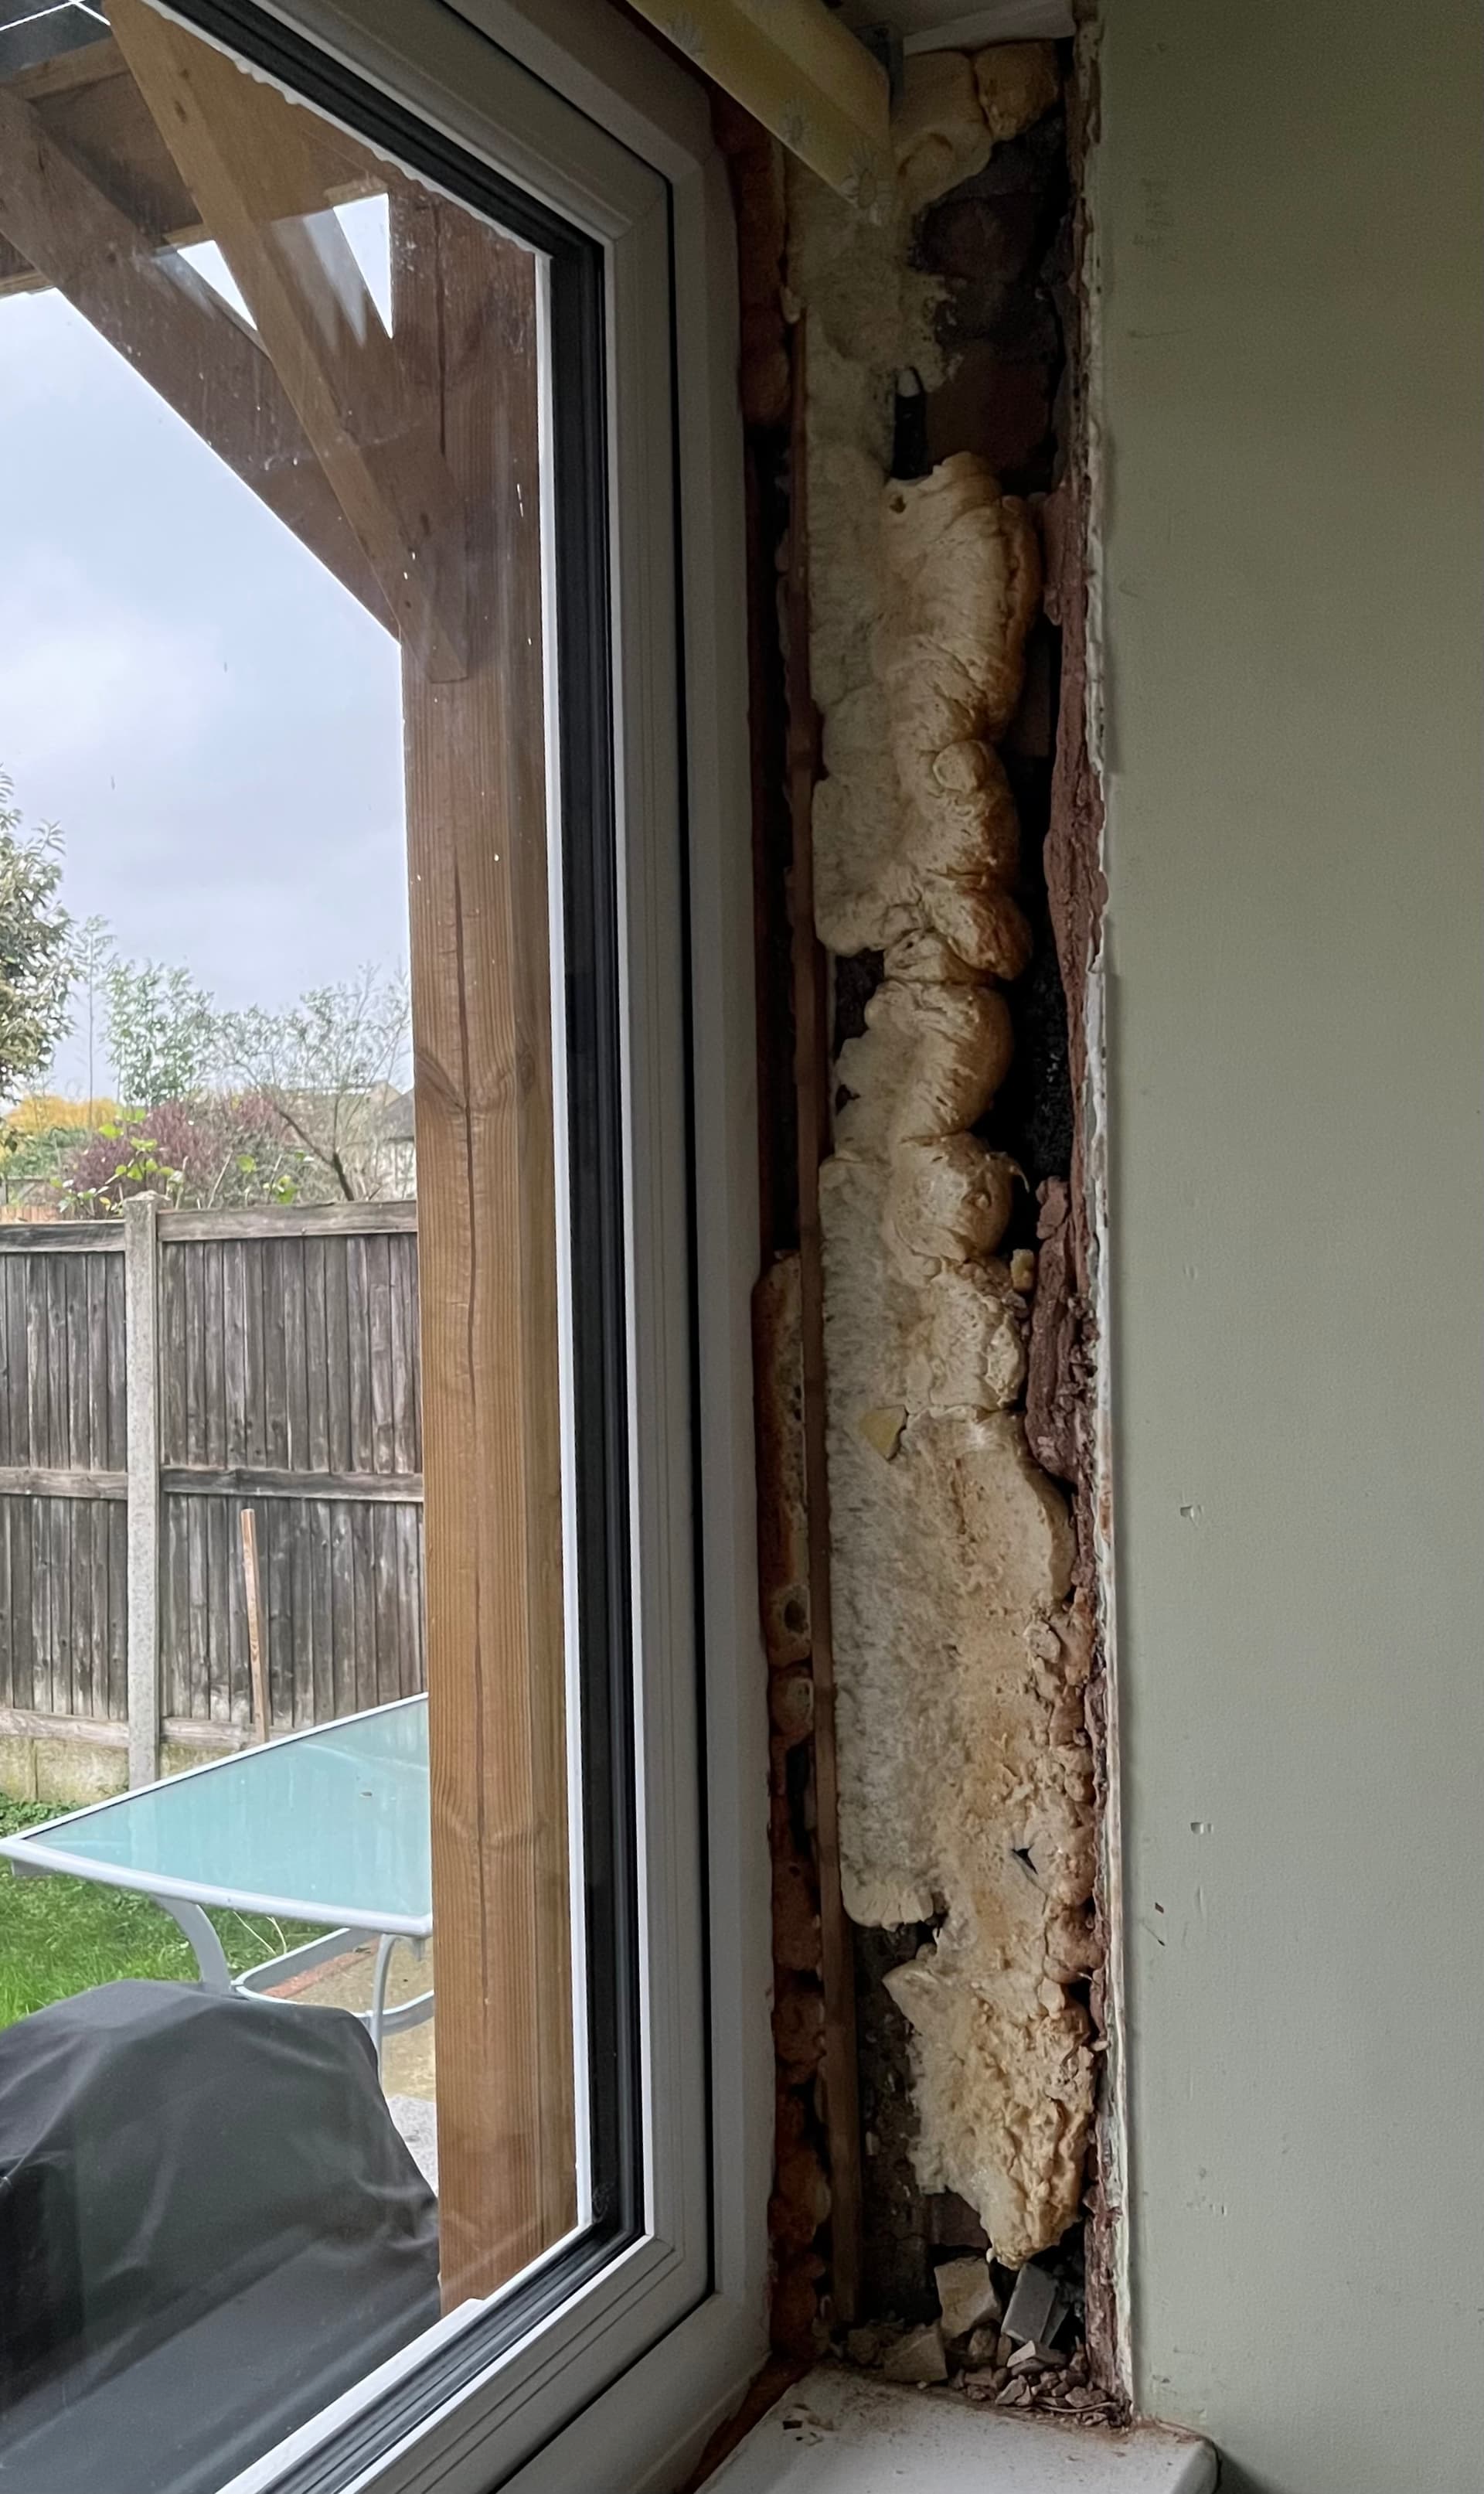
There are plenty of voids to fill. I have bought insulating lime plater to produce a lasting finish. The area is small so I’m hoping results will look ok.
Any ideas for removing the window board without damaging it on top and without damaging the tiles? I really don’t want this to end up as a never ending project.
it’s cool and blowing outside so I thought I’d take “before” thermal images although it isn’t strictly before as I’ve been cleaning the surfaces ready for plastering. I also haven’t been able to remove the top board, which appears to have been glued in place with silicone sealant before being screwed. I think I’m about half way there. If conditions permit I’ll add a thermal image of the lintel once exposed.